Showing posts with label Recipe. Show all posts

Tuesday, October 8, 2019

Tuesday Recipe: Crockpot Pumpkin Cranberry Bread

Talk about easy! Sometimes, I am skeptical and ditch a recipe before I ever attempt it, because the results seem puffed. The results -taste & texture- were not puffed with this #PunkinChunkin recipe for #31DaysofPumpkin. In fact, they were right on!

Last year was not short on busyness and we found it necessary to fire up the crockpot for food prep and dinners several times each week. At the onset of the holiday season, I found Better Homes & Gardens Special Interest Publications' Pumpkin Recipes mag with this too-good-to-be-true recipe. Yep, I ditched it thinking there was no way the texture could come out as though baked in an oven.

I was wrong.

This bread is every bit easy. Every bit full of flavor. Every bit oven-baked texture. It takes 2 hours on high. 

One note: I was thinking of making this with blueberries, instead, because I haven't seen fresh cranberries in the grocery store, yet. Then, Momma and I mulled the use of dried cranberries, like Craisins. We rehydrated less than the recipe's measurement of dried cranberries with enough hot water to cover the berries and let stand while I worked on the rest of the recipe and prepared the crockpot. When it was time to add the berries, I drained the water, patted them dry-ish with a few paper towels and referred back to recipe. They worked just fine!

Crockpot / Slow Cooker Pumpkin-Cranberry Bread

2 eggs
3/4 cup Pumpkin Purée (100% canned pumpkin)
1 cup Sugar
1/2 cup Vegetable Oil (I used olive oil.)

1 2/3 cups All-Purpose Flour
1 Tbsp Pumpkin "Pie" Spice (You can totally make your own PS.)
1 tsp Baking Soda
1/2 tsp Salt

3/4 cup Fresh or Frozen (thawed) Cranberries (or refer to the note, above)
1 Tbsp All-Purpose Flour (to coat part of the cranberries)
1/4-1/2 cup Pecans, chopped


  • Coat a 4 qt Slow Cooker with nonstick cooking spray; set aside. I would suggest NOT USING the slow cooker/crockpot plastic bag liners, because of the steam issue.
  • In first bowl, combine eggs, pumpkin, sugar and oil.
  • In second bowl, stir together next four ingredients. 
  • Add pumpkin mixture all at once to flour mixture; stir just until dry is combined. Do not over stir.
  • Toss 1/2 cup of cranberries with 1 Tbsp flour and fold into batter.
  • Spoon batter into prepared crock of your slow cooker (a.k.a. crockpot).
  • Top with remainder of cranberries and pecans.
  • Cover and cook on high for 2 hours. If possible, lift and half-turn crock insert halfway through cooking. BE CAREFUL WHEN LIFTING LID... do not let steam condensation from lid drip onto bread. Wipe the lid. After the half-turn, cover and continue cooking.
  • Bread is done when toothpick comes out clean... 2 hours.
  • If possible, remove crock insert from slow cooker and set on wire rack for 10 minutes, uncovered.
  • Place a cutting board or plate on top of crock insert and carefully flip crock and plate, together, allowing bread to drop out of crock. THEN, turn bread over onto a wire rack to finish cooling.
NOTE: Do you know why it's necessary to coat part of the cranberries? Whenever you plan to stir-in berries, nuts, or choco chips, you want them to "suspend" in the batter while baking instead of sinking all the way to the bottom and possibly scorching. Just toss the stir-ins in a tablespoon of all-purpose flour and, then, stir into the batter!

GO PLAY WITH YOUR FOOD! I would love to hear how your bread turned out! Lemme know, below...

"Sam"

Tuesday, October 9, 2018

Tuesday Recipe: PUMPKIN SOUP

Every October I do #PunkinChunkin #31DaysOfPumpkin as a fun expo of all things pumpkin and squash and pumpkin spice. I try the newest packaged food, restaurant offerings and other pumpkiny products giving my two-cents-worth of opinion. Going with the creative flow, I try out recipes or generate some of my own concoctions.

Momma wasn't feeling too perky and I was getting pretty hungry, so we needed a quick-fix dinner. Time to either get creatively nutritious or run through the drive-thru for something not good for us. I tend to prepare to the size of the pot and end up with way too much food. So, I chose the smaller pan to limit the recipe and here's what popped out of the pot...

PUMPKIN SOUP

2 cups 100% Pumpkin (not the pie filling)
1 cup Almond Milk (or your choice of "milk")
32 ozs Vegetable Broth (the entire package)
2 Shallots, thinly sliced (or a small mild, sweet onion like Vidalia)
1 tablespoon Olive Oil, your choice
2 tablespoons to 1/4 cup Maple Syrup
1/2 teaspoon Nutmeg
**optional: 1/4 teaspoon Cinnamon
**optional: 1/2 teaspoon Curry Powder
Salt, to taste
**optional: Sriracha Sauce, added to each bowl, to taste

Note:  I did not have a clove of garlic to sauté with the onion, but the veggie broth had enough essence of garlic for this recipe.
  • Sauté thinly sliced shallots (and garlic, if you choose) in just a little Olive Oil until transparent.
  • Add spices to shallots and slowly stir-in "milk" and broth and maple syrup.
  • Spoon-in pumpkin stirring until loosened.
  • Let simmer.
  • Salt, to taste.
  • If you want a velvety bisque, use an immersion blender to zip all ingredients down.
  • If you don't mind the thinly sliced shallots (or onions & garlic), just stir occasionally making sure the soup doesn't scorch on the bottom.
  • Serve with a good bread and perhaps a dollop of sour cream. ENJOY!
Tip: Each person can add the curry or sriracha to their bowl. Add a little at a time and taste.

Go play with your food!

Tuesday, October 24, 2017

Pumpkin Mac & Cheese

Indulgent? You betcha!

Easy? Yes! You'll wonder why you waited so long to ditch the box of mac-n-cheese.


This is one of those base recipes to be customized to most any upgrade you can dream up... like this seasonal variation!


PUMPKIN Mac & Cheese


1-2 cups Dry Pasta, cooked (My fave is Cavatappi!)

2 tablespoons Butter or Olive Oil
2 tablespoons All-Purpose Flour
1-2 teaspoons Black Pepper
(optional: Ground Nutmeg)
Fresh Rosemary leaves, finely chopped 
2/3 to 1 cup Milk (evaporated, cow or nut)
1 cup-ish grated Gruyere Cheese, (I use a simple box grater. Cheese grates easier when cold.)
2/3 cup to 1 cup of 100% Pumpkin
Bread Crumbs or Panko

  • Prepare dry pasta according to package -- to al dente! While pasta cooks...
  • In large skillet, melt butter over medium heat.
  • When melted, whisk in an equal amount of all purpose flour. 
  • While whisking, add your black pepper and nutmeg (my preference). Don't walk away. This could scorch quickly.
  • Add milk while whisking; reduce heat to allow sauce to thicken. It's ready when it coats the back of a spoon!
  • At this point, add your grated cheese and rosemary and watch the melted magic happen! Taste it! Does it need more? 
  • You've just created your cheesy sauce!
  • Stir a little measurement of pumpkin into your sauce. Taste it. Does it need more? If so, add it!
  • Toss in your cooked pasta.
  • Now, you have a choice: Serve from the skillet --OR-- Pour into a casserole dish, top with bread crumbs and bake until bubbly. 

TIPS:
(1) Try Gouda Cheese instead of the Gruyere.
(2) I don't add extra salt to the pasta or the sauce, because cheese is pretty salty.
(3) Add spices, like black pepper and nutmeg, to the flour in the skillet. Spices tend to distribute better at this point.
(4) You can cook down your own pumpkin or use 100% pumpkin from a can.

LOOK AT YOU! You're a mac-n-cheese chef! Go play with your food!

Saturday, October 21, 2017

Broccoli, Pumpkin & Peanut Stir-fry

During autumn, local Farmer's Markets will have pumpkins of all shapes, colors and uses. Be sure to ask him or her for the most flavorFULL for your recipes and which is best for carving the jack-o-lantern for decorating your porch!

Lenise, my friend from church, gifted me with Basmati Rice from India! I couldn't wait to stay home long enough to get creative in the kitchen using the fragrant rice. A rice cooker is my preference while cooking the veggies, because it will automatically cut-off and I don't have to babysit a pot of rice. WINNING!

For this stir-fry recipe, I diced a little more than 1 cup of the cute little Sugar Pie Pumpkin and roasted the rest to be used, later, for other recipes. Stir-fry is a quick cooking dish perfect for after work. Taking only a few minutes, the veggies cook until slightly softened. If including meat or tofu with this dish, prepare and cook before the veggies.

Broccoli and Pumpkin Stir-fry

1 Onion, diced
1 cup Pumpkin, peeled & diced
2-3 cloves Garlic, minced
1-3 large Carrots, peeled & cut
1-2 large Broccoli heads/bunches, cut into florets a.k.a. "little trees"
8 oz sliced, fresh Mushrooms
1-2 tablespoons Oil (coconut or olive)
For "heat" - Red Pepper Flakes  -OR-  Sriracha
Creamy Peanut Butter & Low Sodium Soy Sauce  -OR-  Chinese Brown Sauce (scroll toward bottom of this post)
Basmati Rice
(optional: Extra Firm Tofu drained and large diced, Chicken or other meat thinly sliced)
  • Heat oil in large skillet to medium high.
  • Sauté onion, pumpkin and carrots until slightly softened. Keep stirring to prevent scorching.
  • Add garlic, broccoli and mushrooms. Keep stirring to prevent scorching.
  • Here's when you add your choice of sauce. Turn down the heat. Pour in enough soy sauce to cover the bottom of the skillet and stir in a big glob of creamy peanut butter  --OR-- use Chinese Brown Sauce in the place of soy sauce. Because veggies are different sizes, just play around with measurements until your veggies are coated and the consistency is where you like it!
  • Add heat...if you're not a wuss!
  • Serve over cooked Basmati Rice and garnish with chopped peanuts.
  • Enjoy!
NOTE: If using meat, cook in heated skillet, then set aside and add before serving


Chinese Brown Sauce
(Forks Over Knives... I've subbed in Molasses & Corn starch)

1/3 cup Low-sodium Soy Sauce
1/3 cup Vegetable Stock
1/4 cup Molasses
1 tablespoon Grated Ginger or Ginger Paste
2 cloves Garlic, peeled & minced
1-2 teaspoons (or more) Corn Starch, dissolved in cold orange juice (water or pineapple juice would work, too)

Combine all ingredients in a medium saucepan and cook over medium heat until thickened. If there are any left-overs, serve with meal or store refrigerated in airtight container.

OK! Go Play with Your Food!

Monday, October 2, 2017

October Skillet Hash

October Skillet Hash with Fire Roasted Tomatoes
Right up there with Christmas in December is my other favorite, ALL THINGS PUMPKIN in October!

As a foodie, I get pretty excited about ways to enjoy the little plump squash. From sweet to savory to seeds to spice, I think it's tasty, healthy and the color is pretty nice! Today's recipe is a spin on a previous recipe, Veggie Skillet Hash, originally posted in October, 2013.

So, how did I change it up? Three ways: I added diced pumpkin and sweet potatoes in my little cast iron skillet while my hubby's skillet had chicken. The third way is by listening to a reader of my blog (and sister kitchen-ninja) when she suggested I add Fire Roasted Tomatoes for that "extra juiciness." Sorry, it took me so long to get there!

October Skillet Hash

1 large, Onion, diced
1 Red Bell Pepper, diced
3 cloves Garlic, minced
1 tablespoon fresh Rosemary leaves, chopped
1 tablespoon fresh Thyme leaves
1 teaspoon ground Sage
3-4 Red Skin Potatoes (or whatever ya got), diced
1 cup Pumpkin, diced (or substitute butternut squash)
1 small Sweet Potato, peeled & diced
1 (15 oz) can Cannellini or White Navy Beans (whatever ya got), drained & rinsed
1-2 cups Kale, large stems removed & leaves coarse chopped
1-2 cans Fire Roasted Tomatoes
S&P, to taste
Red Pepper Flakes

Olive Oil
(optional: 1-2 chicken breasts, sliced thinly)

...and before Fire Roasted Toms were added.
Because my hubby doesn't care for pumpkin nor sweet potatoes, but wants meat, I divided some of the ingredients between the two cast iron skillets.

  • Sauté onion and red bell pepper over medium heat in olive oil or splash(es) of water until just getting soft.
  • Add garlic, herbs, diced potatoes, pumpkin and rinsed beans. Cook slowly --don't rush-- until taters and pumpkin are fork-tender, approx 20 minutes.
  • Add kale, seasonings and fire roasted tomatoes and continue cooking until kale wilts and skillet is bubbly!

Serve with a good bread or cornbread or crackers, even! Enjoy!

Tip: If you have left-overs, the taters and pumpkin may soak up the "extra juiciness." Re-saucy with a little bit of water or veggie broth.

Go Play with Your Food!

"Sam"

Monday, July 17, 2017

Recipe: Veggie Broth

It's no mystery. I thought it was.

As a young wife and mom... <REPHRASE> As a young cook discovering her creative juices, I would spend money on cans and waxboard containers of chicken stock, beef broth, veggie broth, seafood stock thinking it must be a difficult, all-involving task to create. 

Nope, it's not. 

Applied knowledge is power!

We all know water adds no flavor when cooking and boiling. Grains like rice and quinoa absorb the water yielding very little flavor. Substituting broth in the place of water creates depth or layers of flavors. Suddenly, you're not trying as hard to make the bland potato tasty by adding tons of salt, because it has absorbed the flavorFULL broth!

Summer's fresh vegetable bounty is a perfect time to create a savory broth or stock to freeze until the chilly winds of fall and winter call for steamy soups and hearty stews. Making your own broth is as easy as... 

Oh, wait. The difference between stock and broth?

First, STOCK"Livestock makes Kitchen Stock." Stock is made when the bones (sometimes, with the meat attached) are covered in water and cooked for hours until the flavor and gelatin from inside the bones is rendered. It's just this simple: Chicken Bones = Chicken Stock; Turkey Bones = Turkey Stock; and Beef Bones = Beef Stock. Same for fish. For seafood stock, I have boiled the shells and shrimp heads after peeling raw shrimp to make a broth. Purists may choose to cook the bones without adding herbs and aromatic veggies, such as onions and garlic. <meh>... to each her own. 

Vegetable Stock vs. Vegetable Broth. Keep reading...

Next, BROTH. Broth is the clear-ish liquid after the bones and extra flavor (aromatic veggies and herbs, etc.) have been strained out. Purists will be militant about clarity. If that's you, use cheesecloth to strain the broth. Not being that picky, I opt for a colander with small holes or mesh strainer over an empty container to capture the flavorFULL liquid, which may be slightly cloudy. 

How did I make my latest batch of VEGETABLE BROTH pictured in these photos?

Into a large pot or "stock" pot, I tossed in the following:

Fresh Corn Cobs. There's flavor in the cobs! I cut off the corn to use in recipes.
Root ends and tops of green onions wilting in the fridge. I sautéd the white and light green parts in a different recipe.
Bell Peppers that were soft with some bad spots. I cut out the bad spots, removed the stem, seeds and white membrane leaving the peppers in big chunks.
Large Onion or 2 cut in half with the skin and root bottom. It's all gonna be strained out.
Garlic cloves. Whole or crushed? I don't remember. Maybe, cut and tossed in.
Celery Ribs. Leafy tops and all, cut, and washed, first.
Carrots cut into big chunks.
Rosemary Stems with LeavesIt's my favorite herb.
Whole Peppercorns. I had 'em, so I used 'em.

I added enough water to cover the veggies. TIP: Do not add salt. I placed the lid loosely on pot and walked away. The veggies simmered or lightly boiled for a couple of hours. My house smelled delicious!

I let the stock cool completely, and, then, strained out the veggies. I prefer to freeze my broth in either freezer zip baggies, doubled, or in clean jars. If this is your choice, remember: Do Not Fill to the Rim. The freezing liquid expands with enough power to break a jar...in the freezer...creating a mess and splinters of glass. All your hard work of capturing a flavorFULL broth will have to be trashed. Learn from my mistake.

This cold weather season, when you start thinking soup would be perfect, take the jar(s) or baggie(s) of broth out of the freezer, place on a kitchen towel or in the sink to let thaw. Use the thawed broth  --that broth YOU made with your own two creative hands--  in your favorite recipes for a truly homemade taste! Now, you can add the salt.

FYI: Onion, bell pepper and celery are known as the "holy trinity" in Cajun cooking. GO PLAY WITH YOUR FOOD!

Tuesday, July 19, 2016

Tuesday Recipe: Just Peachy

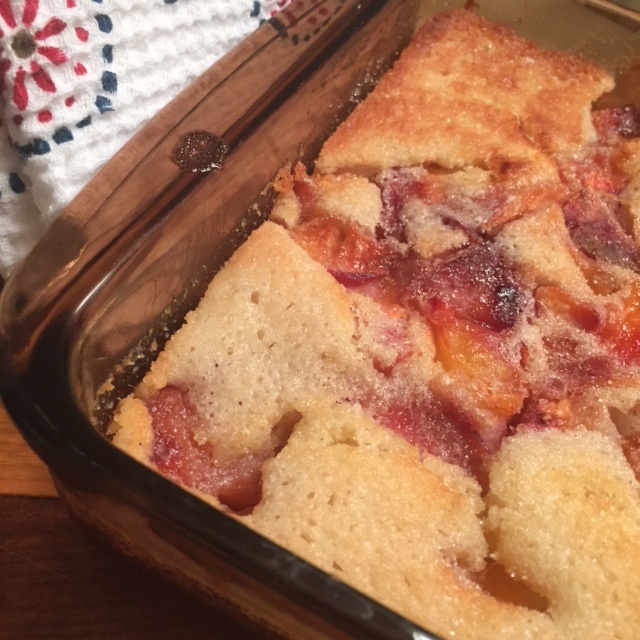
Summer time means fresh produce at the peak of their sun-ripened season! We have a fave place to get sweet, juicy peaches -- Georgia! To be exact, Exit 142 off I-75 is a little peachy heaven called LANE SOUTHERN ORCHARD where one can enjoy everything peachy from pies, ice cream, and syrups to soap! This is where you can purchase a small bag of peaches or a half bushel. If you buy the big box, you'll want to savor the flavor well into winter, as well as slurping the deliciousness, now!


Peeling is up to you! If you choose to make a cobbler, don't be too hasty to discard the fuzzy peel. If you're canning for peach jam or preserves, you may want to peel the peaches. Defer to your recipe on that one; however, I understand there is actually a Peach Peel Jelly! Hmmm. Peaches may be sliced and frozen!


Let's say you choose to peel your peaches. Toss those peels and pits into a pot with enough water to cover everything, (consider a 1:1 ratio, for each cup of peach slices and peelings, add a cup of water) bring to a slow and long simmer to bring out the sweet goodness to make PEACH NECTAR. Add some sugar or honey and a splash of lemon juice. 


After the  peels and pits have rendered a pulpy nectar, remove pits, allow to pulp to cool, process in blender or processor until smooth. Use a towel on top of blender for protection. Pour into containers to freeze, leaving enough space in jar or container for expansion in the freezer. Nectar can be thawed, later, to add to recipes or over ice cream or pancakes or added to smoothies, etc.


PEACH COBBLER (simple, not super sweet) 

1 cup Self-Rising Flour
1 cup Sugar
1 cup Milk (or your fave "milk" - almond, coconut, soy)
2 cups Peaches, sliced or chunked
1/2 cup Butter


  • Melt butter in 9x13 casserole dish in 350* in preheated oven (or while it's preheating).
  • In separate bowl, mix together self-rising flour, sugar and milk.
  • Pour into melted butter in the baking dish, stirring around.
  • Spoon peaches with the syrup they've made, evenly into the batter. Sprinkle with sugar or turbinado for a little "extra love."
  • Bake 350* for 30-45 minutes. 
  • Let cool -just a little- before serving!

Let me know how yours turn out! Now, git in there and play with your food!

Tuesday, June 7, 2016

Tuesday Recipe: Orzo & Roasted Veggie Bake

(served in my grandma's china)
My momma does not claim to be a "good cook." Where she gets this, I'll never know because she learned from her mother who was a wonderful Southern cook. Perhaps, it's that perceived mystery where everything Mom makes tastes so much better, including PB&J. 

Somewhere amid her cookbooks and notebooks and recipe box with cards dating back to before I was born, Mom found this. The flavors just work and, because we are a Lou'siana family, we add fresh Gulf Shrimp! No leftovers, guaranteed.

Orzo & Roasted Veggie Bake

1 lb/bunch Asparagus, trimmed to 1" pieces (do not use the fibrous, woody cut-end)
3 Bell Peppers, diced - red, green and orange makes a dish tasty to the eyes
6 Green Onions OR 1 Vidalia Onion, diced
1 medium Zucchini, round-sliced
1 cup Grape Tomatoes, whole, OR Cherry Toms, halved
4 T Olive Oil, divided
1-2 cloves of Garlic, crushed or minced
1 tablespoon Greek or Italian Seasoning
S&P, to taste
1 cup dry Orzo (I found whole wheat, but have used the other, too)
2 cups Vegetable Broth
3/4 cup Feta Cheese, crumbled
*optional: shrimp

  • Preheat oven to 350 degrees.
  • Prep veggies. Toss well with 2 T of Olive Oil, garlic, seasoning, S&P.
  • Roast seasoned veggies on parchment or Silpat (easy cleaning) for 30 minutes or until tender.
  • While veggies roast, sauté dry orzo in remaining olive oil in a large sauté pan or skillet until brown. This gives the orzo a nutty, earthy flavor. The process reminded me of the old Rice-a-Roni!
  • Add broth, bring to boil, reduce heat to low, cover with lid cooking until liquid is absorbed.
  • Add cooked orzo to roasted veggies (and shrimp, if
    using). Gently mix well.
  • Pour into a large casserole dish.
  • Sprinkle Feta cheese over top. Cover with foil. 
  • Bake 30-ish minutes, making sure shrimp is cooked.
  • Serve hot with an extra sprinkling of Feta + a good Olive Bread and seasoned olive oil for dipping!


Notes:
**Swap in any veggies you prefer: Diced Butternut squash, Brussel Sprouts, Parsnips or Carrots!
**Omitting the shrimp and Feta makes this vegan or Plant-based.
**Let your taste create a new dish with the meat of your choice, but you'll need to know when to add the meat.
**Our side was Graber Olives from California. I found them, again, in Tennessee at The Fresh Martket!


Play with your food!

What's your take on this recipe? 
Have you ever served dipping olive oil?

Tuesday, May 3, 2016

Tuesday Recipe: Shrapnel Dip

When good friends get together, there's good food to go with the fun. Why bother with the plates when the party can happen standing around the kitchen island loaded with fare that brings us together? 

"Mmmm!"
"That is sooo yummy!"
"Oh my goodness!"
"I gotta have this recipe!"

One dish that had us hanging over the bowl scooping with tortilla chips was texted to me while hanging over the bowl scooping with tortilla chips! Thanks, Gabs! Now, you can hang over the bowl scooping with tortilla chips laughing it up with friends!

Shrapnel Dip

1 can White Beans (like navy beans)
1 can Black Beans
2 cans Green Giant Steam Crisp Corn! (Trust me on this!)
1-2 Avocados, diced
1-2 Red or Orange Bell Peppers, diced (Because they're pretty!)
Grape or Cherry Tomatoes, halved & quartered
Cilantro, leaves only chopped
Fresh Lime Zest & Juice
Salt & Pepper, to taste
optional: 2 Tablespoons Red Onion, finely chopped (None for me.)


Choose the sauce... What brings it all together depends on your tastebuds. I experimented with 4 different options, all to taste and texture:
(1) 3-4 Limes, zest and juice (My fave!); or
(2) Italian Dressing; or
(3) Wish-Bone Balsamic Vinaigrette; or
(4) NEW! Wish-Bone E.V.O.O. Dressing Lemon Herb (What I went with for an after party!)

  • Drain AND Rinse beans and corn together in colander. Then, PAT DRY to remove excess liquid. Ain't nobody got time for soggy chip.
  • Gently mix all veggies, cilantro and lime zest together.
  • Squeeze lime juice over the veggie mixture.
  • Decide which sauce choice to gently fold into the veggie mixture.
  • Serve with tortilla chips!
Here's an idea... add a finely chopped jalapeño for some heat!

Go #playwithyourfood!

Tuesday, May 26, 2015

Tuesday Recipe: Cabbage Salsa

Whether or not "salsa" is the correct word is purely subjective. It tastes good on a tortilla, a tortilla chip and will top tonight's grilled shrimp taco. See? Salsa.

Actually, the basic recipe came from a healthy food blogger, Lindsay, over at Pinch of Yum where she created a "slaw." Of course, she realizes people like herself tend to adapt recipes to their specific taste. And, of course, I just gotta go play with my food to change it up ever so slightly.

A food processor is not required, but greatly cuts down the preppin' time and gets ya to the eatin' time! So fresh!

Cabbage Salsa

1/2 cup Olive Oil
2 tablespoons to 1/4 cup Water
Lime Zest & Juice (How big are your limes?)
Green Onions
Garlic
Jalapeño (How hot do ya like it?)
Cilantro
Green Cabbage, shredded or finely sliced
Salt, to taste

  • Toss all ingredients, with the exception of the cabbage, into the food processor and zip it down! I zipped the cabbage down, earlier.
  • Taste. Does it need more of your fave flavor? Get it to tasting like you like it. Then...
  • Pour over 2+ cups of shredded or finely sliced cabbage and toss it around to coat the cabbage.
  • Um...no more steps. Go eat it and...
Play with Your Food!


Tuesday, April 14, 2015

Tuesday Recipe: Cheesy Potato Bake

Mmmm! All around our family post-Easter dinner table decided this side dish was a keeper! I mean, after all, potatoes and cheese and garlic just go.to.ge.therrrr!

Cheesy Potato Bake

1-2 tablespoons Olive Oil
Figure 1 Russet Potato per person (thinly sliced rounds) 4 potatoes for this particular recipe
1 large Red Bell Pepper, chopped
1 Onion, diced
1-2 cloves Garlic, coarsely minced or chopped
1 (8 oz) block or package Pepper Jack Cheese, shredded
S&P, to taste
(optional: fresh Cilantro, coarsely chopped)

  • Preheat oven to 400 degrees.
  • Heat olive oil in skillet over medium-high. Add bell pepper and onion. Sauté until tender. (OR, if you prefer, consider a dry sauté or water sauté.)
  • Add garlic; sauté slightly.
  • Arrange half of the sliced potatoes in a lightly oiled casserole dish.
  • Season potatoes with Salt & Pepper; spread half of the bell pepper, onion and garlic sauté mix and sprinkle with half of the shredded cheese. **Our family really loves cilantro. I sprinkled half of the cilantro, stems and all, on this first layer and saved the rest for after baking.**
  • Repeat with another layer of potatoes, seasoning, sauté and cheese.
  • Cover (with foil or lid) and bake 40 minutes.
  • Uncover and bake until potatoes are tender and cheese is golden, 15-20 additional minutes.
  • Remove from oven, sprinkle with cilantro and serve!

Comfort food with a Latin kick OR NOT, instead use your fave cheese! Play with your food!

Tuesday, April 7, 2015

Tuesday Recipe: White Bean and Vegetable Barley Soup

In that weird transition from winter to spring when the temp bounces and weather systems fight like toddlers over the same space and toy, I felt it was still ok to go for soup as a "souper" fast fix for supper using what was already in my pantry. I happened to have everything to make this wonderfully healthy soup and served it with a slab of cornbread! The house always smells so good when cornbread is baking!

White Bean and Vegetable Barley Soup
(eMeals.com subscription - slightly revised)

1 (32 oz) container box Vegetable Broth
1 (15 oz) can Cannellini Beans, drained & rinsed
1 bag frozen Mixed Vegetables (with carrots and green beans)
1/2 cup Quick-cooking Barley (I used Quaker brand.)
1 fistful fresh Baby Spinach
S&P, to taste
(optional: 1 can Rotel Tomatoes and Green Chilies - Mild (I used a generic brand.)

  • Combine broth, drained & rinsed beans and frozen mixed veggies in pot and cover and bring to boil.
  • Stir in barley and baby spinach, reduce heat and simmer for 10 minutes.
  • Voila! You're done!

Unless...
  • If you prefer a spicier kick - as with my hubby for the second meal with this soup - add the Rotel! Heat to boil for 10 minutes OR simply add it with the mixed veggies!
  • Voila, again! Enjoy!

Play with your food!


A few years ago while looking for new vegetarian & flexitarian & vegan recipes, a couple friends suggested I look into an emeals subscription. As it turned out, GroupOn was running a special, too! I selected my choices of meal subscription and how many people I would be serving in my family. The weekly meal planner divides meal offerings with a grocery list! All of which can be saved and printed to place in a binder! Even Dave Ramsey thinks emeals is a "no brainer!"

Tuesday, March 17, 2015

Tuesday Recipe: Roasted Red Pepper Quesadillas

Some days you just gotta have some cheesy, spicy (or not) Texican-Mexican flavor! Here's a super fast resolve to settle your inner longing for the Southwest when you are far, far away and "#7 Speedy Gonzalez" menu item will never suffice.

Roasted Red Pepper Quesadillas

1/2 to 1 cup  bottled Roasted Red Bell Peppers, drained & sliced
1 tablespoon Mayonnaise (or Vegannaise)
1 cup + Colby Jack/Fiesta Blend or Sharp Cheddar, shredded
Cilantro, chopped
For heat: 1 Jalapeño Pepper, seeds & membrane removed, chopped OR
For heat: splashes of Sriracha, to taste
(optional: 1-2 splashes of Mesquite Liquid Smoke)
(optional: sauté one small onion, diced)
Flour Tortillas, size and flavor depends on you
Olive Oil or spray oil

  • Drain Roasted Red Bell Peppers and slice into strips.
  • In medium bowl, combine mayo, cheese, cilantro and chopped jalapeño. Stir in strips of sliced Roasted Red Bell Peppers.
  • Heat skillet to medium to medium-high and lightly coat with oil.
  • Spoon some of the cheese mixture onto one side of each tortilla. Then, fold tortillas in half.
  • Slide the stuffed & folded tortilla onto the heated and prepared skillet for 3-4 minutes each side OR until cheese is melted and tortilla is toasted.
  • Remove from skillet. Cut each tortilla in half or thirds to serve!
The breakfast twist on this recipe is to scramble one egg per tortilla. Spoon the cheese mixture and the scrambled egg onto one side of each tortilla and proceed with heating. Serve with salsa and additional cilantro! :)

Go play with your food!

Tuesday, March 10, 2015

Tuesday Recipe: Roasted Jalapeno Poppers

(Before Roasting)
The church where we attend teamed up with Second Harvest Foods to host a Mobile Food Pantry for those who are needing just a little help during a financially difficult time. It was a great day where almost 70 families received the equivalent of about $200 worth of groceries...for FREE! God is so good! Not only did I get a good body workout lifting boxes, my soul got a workout, too.

Because our site had more jalapeños than we could distribute, I was blessed to take home a sack! I'm not into deep fried food and found this quick and easy recipe online to mess around with!

Roasted Jalapeño Poppers

6-8 large Jalapeño Peppers
8 oz block Fat Free Cream Cheese, softened
1 cup Sharp Cheddar or the Monterey Jack & Colby Fiesta Blend, grated
Fresh Cilantro, rough chopped with stems
S&P
(A portion of the heat is in the membrane and seeds)

  • Slice jalapeños in half. Stem is optional. Careful not to rub your eyes during this process! EEK! 
  • Remove seeds and membrane of peppers. Set prepared peppers aside.
  • In bowl, mix up the softened cream cheese, grated cheese, cilantro and salt & pepper and fill the cavities of the jalapeños.
  • Place on a lined cookie sheet. (I lined mine with my Silpat, but parchment or foil will work to keep you from scraping any burned cheese, later.)
  • Bake at 450 degrees for about 10-15 minutes OR until the cheese is bubbly and the peppers are slightly softened.
  • Let cool enough to handle and pop into your mouth!

This recipe serves as a great base to begin playing with the ingredients. You may want to add chopped bacon or onions and garlic to the cheese mixture or wrap the popper with bacon before roasting. Have fun and go Play with Your Food!

Tuesday, March 3, 2015

Tuesday Recipe: Protein Power Balls

Want a go-to, no-bake, pick-me-up, tie-me-over snack? Great! 

If you're into nut butters like peanut, sunflower, almond, cashew, you are so gonna love the simplicity of this recipe. 

If you're a runner, walker or fitness person looking for another way to get some protein in your system without breaking the caloric or fat bank, you are gonna love the power of this recipe.

If you're a whole food grazer who likes the ingredient-control of a homemade treat, you are gonna love the nutrition of this recipe.

Are ya sold, yet?

One of my church friends, Amanda G, found this recipe on a Canadian foodie blog and brought out the power balls during intermission of our Bunco Nite. I had arrived at her house immediately after my sweaty, heart-pumping fitness class when I needed some umph to keep me energized for our fun night. I was super excited to try 'em!

Once you've got the basic recipe down, let your creative juices go crazy with substitutions!

Protein Power Balls

1 cup Rolled Oats (not the quick-cooking variety)
1/2 cup Peanut Butter (or your fave nut butter)
1/3 cup Honey (or to make it vegan, sub-in a agave syrup or the like)
1/2 cup Ground Flax Seed (I take whole flax seeds and grind them in my coffee grinder)
1/4 to 1/2 cup Chocolate Chips (craisins, raisins, chopped nuts, coconut, etc.)
1 teaspoon Vanilla Extract
(optional: 1 pinch of salt)

  • Combine all ingredients, together, in large bowl and mix well.
  • Chill in fridge for 10-15 mins OR, if you're in a hurry, skip this step.**
  • Pinch enough batter to roll into a ball between your palms OR use a 1"-2" scoop (pictured) and place power balls on a large baking sheet lined with parchment or wax paper.
  • Let chill until ready to serve OR until set enough to transfer into a lidded container to store in fridge until whenever you wanna pop a power ball into your mouth!
Play with your food!