Showing posts with label FIT FOODS. Show all posts

Wednesday, October 6, 2021

Creamy Chicken & Wild Rice Soup with Pumpkin

The light yellow is the cubed pumpkin

In 2020, my friend Tracy was participating in #CROCKtober by preparing her family's
meals in the crockpot all October. As it would happen, Momma Mary and I had a hunger for wild rice and had cubed pumpkin and homemade chicken broth begging to be used which meant, I created a quick crockpot recipe for Tracy and our household.

Into the crockpot went easy ingredients and out came a savory, makes-the-world-right soup. BUT, this is a new year to change up that recipe...so, I made it creamy!


CREAMY CHICKEN & WILD RICE SOUP with PUMPKIN

Into the crockpot:

1-2 Onions, diced

Several Carrots, sliced like coins

1-2 Garlic cloves, minced

2-3 Celery ribs, diced

2-3 cups Pumpkin, cubed (or cook separately, see sidenote, below)

1-2 cups Wild Rice blend

10-12 cups Chicken or Vegetable Broth (easily edited to turkey broth after Thanksgiving)

2-3 cups Chicken (omit for vegan version or use turkey after Thanksgiving)

salt, pepper, red pepper flakes, fresh sage, fresh thyme

1-2 8 ozs blocks Cream Cheese (Miyoko's Creamery makes a wonderful vegan cream cheese found at our local Publix grocery store or online)

  • Place all ingredients in your crockpot -not the cream cheese which you'll save for just before serving
  • Turn to Medium for an all-day or overnight slow cook -or- shorten the cooking time by dialing up to High until all ingredients are cooked and the house smells yummy!
  • Just before serving, remove 2 cups of broth from your crockpot and ladel into your blender with the block(s) of cream cheese. Blend until smooth.
  • Pour the zipped-down cream cheese broth mixture into the crockpot and stir to incorporate.
  • Ladel into soup bowls and enjoy!

Here's a sidenote: If your family is not crazy about pumpkin, no worries. Either strike from the recipe -or- in a separate small pot, add the cubed pumpkin and your choice of broth just until covered and gently boil until soft. When the soup is ready to be served, spoon the cooked pumpkin into the bowl and ladel soup over it!

This recipe is good for your tummy and your soul, but don't take my word for it. Go Play with Your Food and let me know how it turned out...

"Sam"

Monday, October 4, 2021

Pumpkin Pie Spice

Mixing up your own batch of PUMPKIN PIE SPICE is easy as ...well, as easy as pie. 

I reuse the container from years ago to store the mixed spices, because it’s already labeled! Too easy.

After you make a batch, then you can do all kinds of recipes with your homemade PS like a home-brewed PSL or an actual pumpkin pie!

What is pumpkin pie spice? 

It's a mixture of the following spices in increments that you prefer:

Ground Cinnamon
Ground Cloves
Ground Nutmeg (I prefer to grate my own from the whole nutmeg seed, available from McCorkmick in the spice and seasonings aisle at the grocery)
Ground Alspice
Optionally, Ground Ginger (my preference)

  • Start with 3 tablespoons of cinnamon. Then, mix it to your taste by adding in teaspoon measurements and tasting or smelling. Add more of the flavor, like cinnamon, if that’s what YOU like! I go a little heavy on the nutmeg, because it's my fave for the holidays! The way I like it is freshly microplaned! (Pictured)

My friend, Jani, showed me how her family enjoys crisp apples. She takes cinnamon and sliced apples, tosses together and chills! The only sweetness is from the apple! I decided this could be done, instead, using the homemade pumpkin pie spice — it works for me! 


Go Play with Your Food and let me know how it goes for you...

"Sam"


Sunday, October 3, 2021

Savory Pumpkin Hummus

Savory & Dessert Hummus 
If you love hummus and you love pumpkin, you may love Savory Pumpkin Hummus. This version uses Tony Chachere's Original Creole Seasoning for the salty kick and, then, an ice water technique to produce a creamy consistency without adding so much olive oil. I'm not a fan of tahini in traditional hummus ...it's truer to say that it doesn't like my tummy. I DO like the way this recipe turned out! You really need either a food processor or one of those fancy-schmancy blenders to make hummus.


SAVORY PUMPKIN HUMMUS

1 15 oz. can Chickpeas (a.k.a. garbanzo beans)

3/4 cup 100% Pure Pumpkin (a.k.a. puree or pack - not the pie filling)

opt. 2 tablespoons White Miso (white miso is milder or you could use tahini or omit, altogether)

2 tablespoons Olive Oil

6 tablespoons Ice Water

1 Garlic clove, minced

1 to 2 teaspoons Tony Chachere's Original Creole Seasoning

1/2 to 1 teaspoon Cumin

opt. 1/2 to 1 teaspoon Smoked Paprika (again, optional)

  • Drain and rinse chickpeas
  • In a food processor, add chickpeas, pumpkin, miso, olive oil and garlic
  • Pulse a few times to get it started and, then, let it rip, adding the ice water a tablespoon
    at a time. You may need to stop occasionally to scrape down the sides
  • Add in Tony Chachere's Original Creole Seasoning (we just call it Tony's), cumin and smoked paprika 
  • Blend until smooth and taste-- Does it need more of something? When you're confident of owning the flavor, spoon into air-tight container and chill until ready to serve with veggies, naan or crackers
Yep. It's that simple! Go play with your food! Let me know how it turned out...
"Sam"

Thursday, October 17, 2019

Tuesday Recipe: Pumpkin, Bean and Chicken Enchiladas

Once again, my skepticism with a pumpkin recipe impacting one of my fave genres of food turns to OH MY GOODNESS! THIS WORKS!

Hubby & I love TexMex! We could eat it 3, 4, 5 times a week! So, when somebody wants to mess with it, we're like, "Naw." But, this is #PunkinChunkin month when I like to try a pumpkin or pumpkin pie spice twist on sweet and savory dishes. Better Homes & Gardens Special Interest Publications issued the PUMPKIN edition for America's pumpkin addiction

After reading several articles online about the ancient Hispanic culture and the pumpkin, I figured the two have made a beautiful life, together. Who was I to think my Mexican food and my orange squash don't work in the same recipe?

I used a blend of the cute little Sugar Pie Pumpkin and the Japanese Kabocha Pumpkin to measure enough cooked pumpkin for this recipe. The Kabocha is a brighter, sweeter flavor -in my opinion- compliments the cumin seasoning, fresh cilantro and soft corn tortillas! It just works!

Pumpkin, Bean & Chicken Enchiladas

2-4 tsp Olive Oil (enough to sauté onion and jalapeño)
1 small Onion, chopped
1-2 Jalapeños, seeded & finely chopped
1 3/4 cups Cooked Pumpkin -OR- 1 (15 oz) can 100% Pumpkin (not pumpkin pie filling)
1 1/2 cups Water
1-2 tsp Chili Powder
1/2 tsp ground Cumin

1 can Black Beans or Kidney Beans, rinsed & drained & smooshed!
2 Chicken Breasts, cooked & shredded -OR- 2 cans of (12.5 oz) Chicken Breast
1/2 cup shredded Cheese (your preferred)
Cilantro, chopped
6-8 Corn Tortillas, softened in microwave 30 seconds between paper towels) I purchased the "Super Soft" White Corn Tortillas at Walmart and bypassed the microwave.
  • Heat oven to 400*. Lightly coat square/rectangle baking dish with non-stick cooking spray.
  • In medium skillet, heat onion and sauté onions & jalapeños until tender and onions are opaque.
  • Stir in pumpkin and water, chili powder, cumin and heat through. If needed, add enough water (up to 1/4 cup) to your desired consistency. 

  • While this mixture is heating...Turn beans (already rinsed & drained) into a large bowl and slightly smoosh with the back of a fork.
  • Add HALF of the pumpkin mixture, all the chicken and cheese and cilantro. Reserve the other HALF of pumpkin mixture to pour over the tortilla rolls, once assembled.

  • Assemble tortillas: Onto a soft(ened) tortilla, spoon about 1/3 cup bean, pumpkin & chicken mixture; roll up tortillas and place seam sides down in prepped baking dish. Pour the remaining half of pumpkin mixture over all of the assembled tortillas. COVER DISH with lid or foil.

  • Bake, covered, 15 minutes. The lid or foil keeps the tortillas and pumpkin mixture
    from drying out.
  • Sprinkle with additional cheese, if desired, and Bake, uncovered, 10 minutes more or until heated through.
  • Serve with extra cilantro, salsa or limes.
Note: I thinned the left-over filling with a little of the pumpkin mixture and poured into an oven-safe dish coated with non-stick spray. Then, topped with the remaining pumpkin mixture and crunched up tortilla chips on top with extra cheese. Made a great TexMex Lunch Bowl for later!

GO PLAY WITH YOUR FOOD! 

I'd love to hear how your enchiladas turned out and what you thought of them or how you changed the recipe to make it your own!

Thursday, October 3, 2019

Tuesday Recipe: Pumpkin Farro Risotto with Roasted Winter Veggies

Last October, I tried this recipe for my yearly #PunkinChunkin / #31DaysofPumpkin from
Vegetarian Ventures and loved it! Of course, I would, because I sub'd in PUMPKIN! One could easily substitute their fave winter root veggies instead of my beloved orange gourd. 

Shelly Westerhausen is a foodie and food photographer with impeccable taste! I look forward to her emails tempting me to get creative in the kitchen! Oh, by the way, she is the genius of two cookbooks on my wish list and both may be purchased on Amazon or other online booksellers. The Platters and Boards book is the current #1 Best Seller and will have you looking like a pro during upcoming holiday entertaining! Check 'em out for yourself after the recipe or scroll to the bottom for your next cookbook!

PUMPKIN FARRO RISOTTO with ROASTED WINTER VEGETABLES

For the Roasted Veggies:

  • 2 cups Pumpkin and/or winter veggies (carrots, potatoes, beets, sweet potatoes, etc.), chopped or cubed 
  • 1 Tbsp Olive Oil
  • 1 tsp Smoked Paprika (I don't know how I lived without this stuff for so long!)
  • opt: S&P, to taste


For the Farro:

  • 2 Tbsp Olive Oil (+ more for finishing)
  • 1 Tbsp Sage Leaves, chopped (+ more for finishing)
  • 1 small Onion, diced
  • 1 1/2 cups Pearled Farro
  • 1/4 cups Dry White Wine / Cooking Wine (You can even find this at Walmart)
  • 3 cups Water
  • 1/2 cup Pumpkin Puree (not the pumpkin "pie")
  • 2 Tbsp Hard Cheese (purchase already shredded, vegetarian is another option)
  • 1 tsp Thyme, chopped
  • opt: S&P, to taste
  • opt: Hazelnut Oil (I didn't have this, but don't let that stop you! I suppose, you could actually get creative, here, by adding chopped hazelnuts when toasting the faro or at the end for finishing!)


Instructions for the Roasted Veggies:

  • Preheat oven to 375* and line a baking sheet with parchment paper or use a Silpat.
  • Toss veggies in 1 T Olive Oil Smoked Paprika and S&P (salt & pepper) and transfer to the lined baking sheet in an even layer.
  • Roast 30 minutes, flipping halfway through or until the veggies are crispy on the outside and soft on the inside. Remove from oven and set aside.


Instructions for the Farro:

  • Heat Olive Oil and Sage over medium heat in a large pan or skillet.
  • Add Farro and let toast... watching carefully so as not to scorch... stir often, for 1 minute-ish. (It would be totally creative to toast chopped hazelnuts at this time, too).
  • Add Onion and cook until opaque / translucent, stirring often for 5 minutes.
  • Add cooking wine and cook until absorbed, again -- stirring often, about 2 minutes.
  • Add Water,  1 CUP AT A TIME, stirring yet some more until most of the water is absorbed before adding the next cup of water. Continue until farro is soft and creamy, about 30 minutes.
  • Stir-in Pumpkin Puree for a couple more minutes to heat it up.
  • Remove from heat and add the Thyme (and hazelnut oil).
  • Top with Roasted Veggies or Roasted PUMPKIN and season, to taste, with S&P (salt & pepper)
  • Serve right away with more chopped Sage, cheese, toasted chopped hazelnuts and a drizzle of olive oil!


GO PLAY WITH YOUR FOOD! But, first, check out Shelly's books...

-Click this Link-


Monday, June 3, 2019

Roasted Salsa Verde

This weekend, we will be in Oklahoma City for my mom-in-law's wedding! After ten years of being a self-sufficient widow and working in Braum's Market, Mom is at her cash register when Mr. Henson walks into Braum's, again, acting like he needs to make a purchase, but really wanting to strike up a conversation with her. Before he leaves, a dinner date has been made!

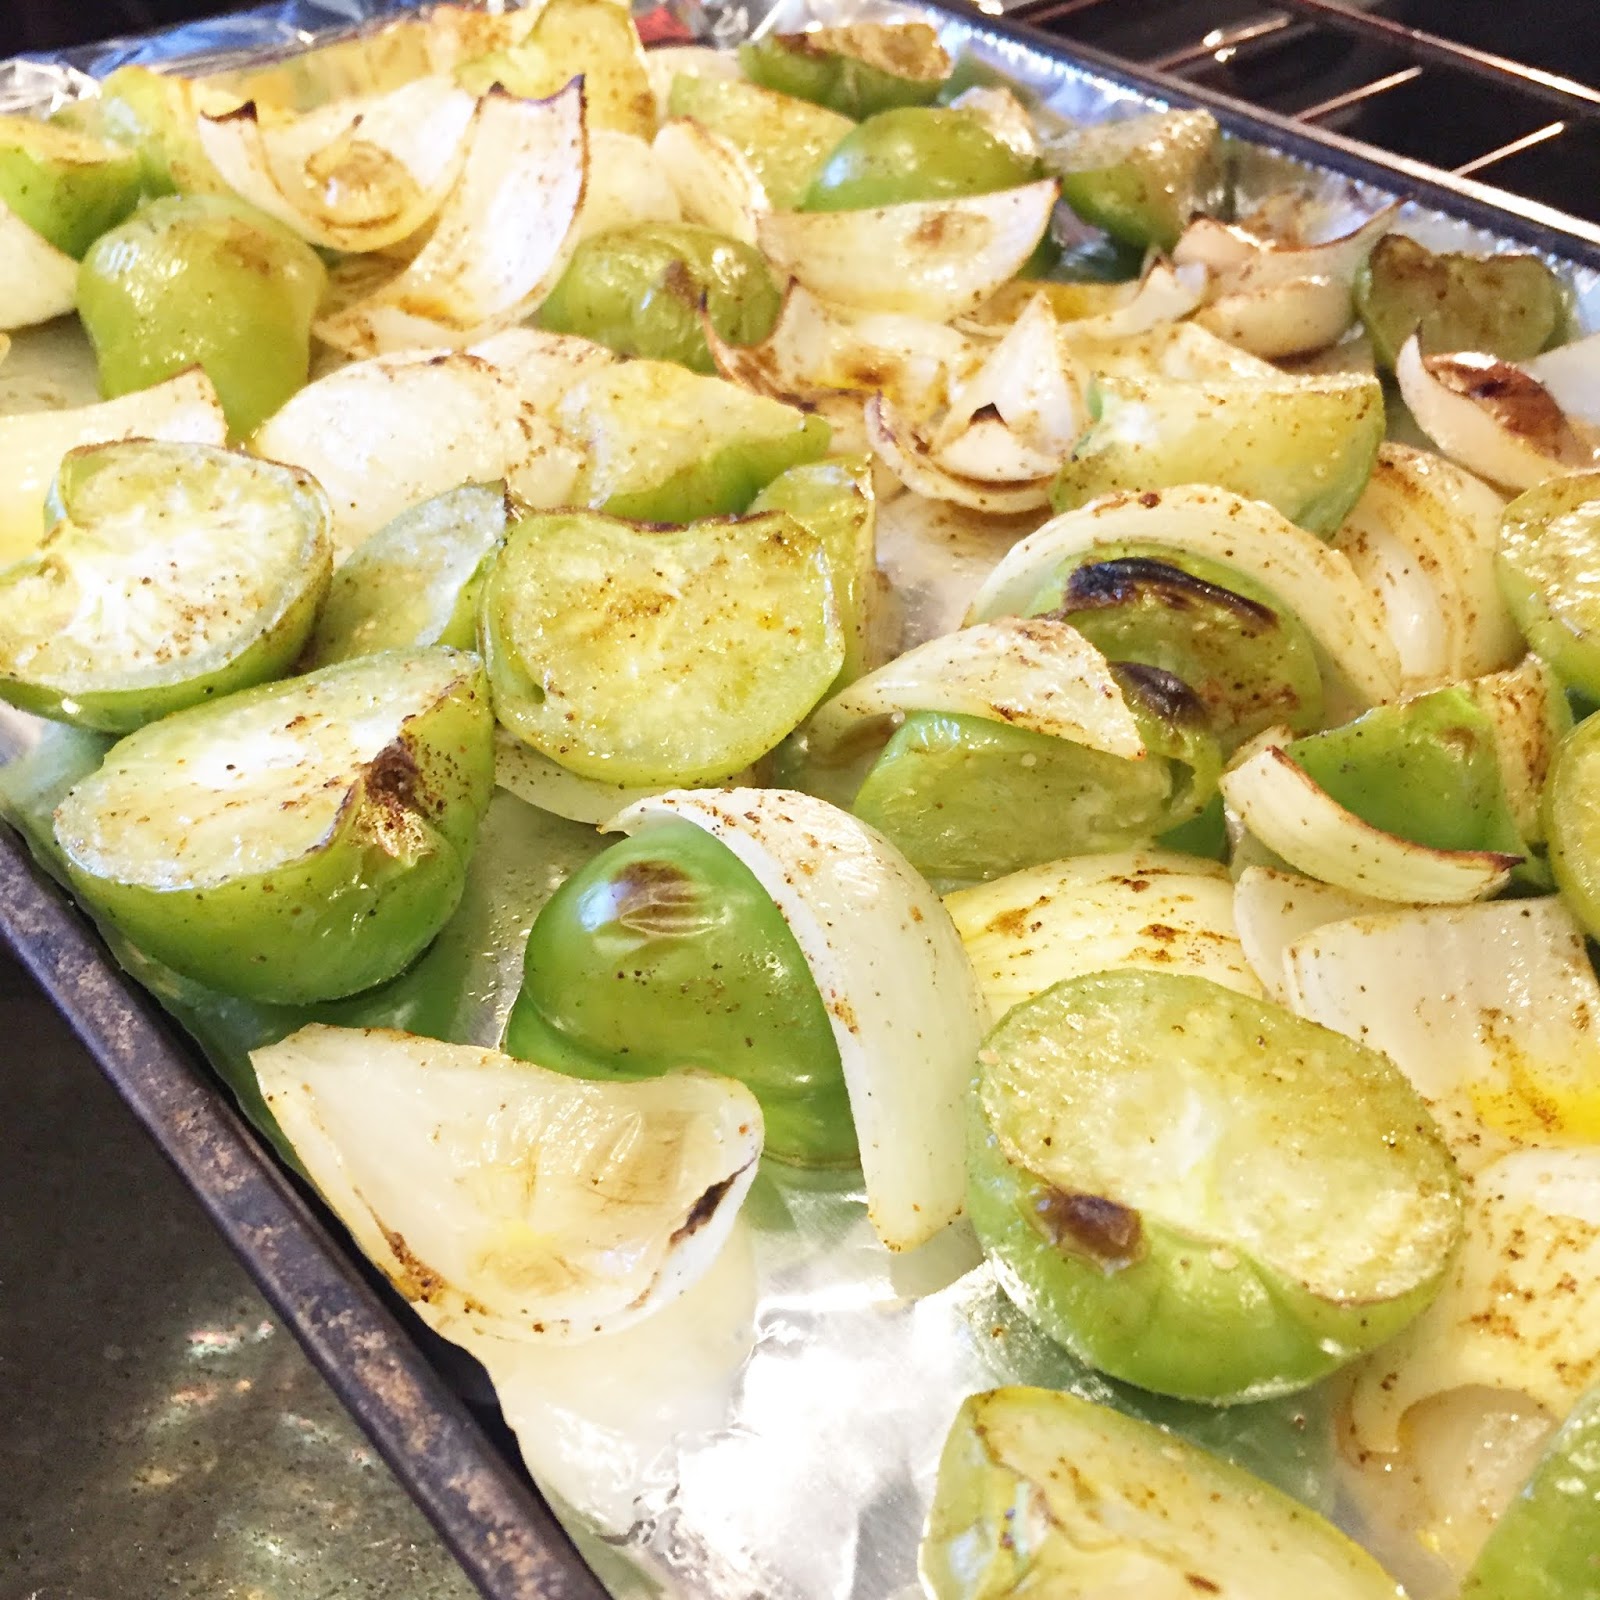
Any time we make plans to head beyond the Mississippi River, I get a strong hankering for TexMex Cantina Food! Last night, I food-prepped a crockpot of Vegetarian Pozole in which the recipe calls for roasting the tomatillos with onion, garlic and poblano peppers. That's when I was glad I had purchased an extra pound of tomatillos! The same ingredients are used for the salsa verde to top Forks Over Knives Portobello Mushroom Tacos in 2013; however, this time I roasted them in the oven under the broiler giving the dish a rustic flavor with the slight charring.

Don't be intimidated by the tomatillos. The husk is easy to unwrap from the green tomatillo which looks like an immature tomato and the skin is a smidge sticky. You want a firm tomatillo.

This recipe requires either a blender or a food processor.

ROASTED SALSA VERDE

Gather & Prep:
1 lb Tomatillos, husk and sliced in halves or quarters
1 large Yellow Onion, peeled, quartered and the layers separated
4 to 6 Garlic cloves (not the whole bulb, just the cloves on the bulb) peeled
2-3 Poblano Peppers or 1-2 Jalapeño Peppers, stemmed, seeded and either halved or quartered. You control how much or little heat you want.

Toss together in a large bowl with a drizzle of: 
2-3 tablespoons of Olive Oil
1 tablespoon Ground Cumin
1 tablespoon Chili Powder

These ingredients are needed for the end processing:
1 bunch Cilantro
2 Limes, zested and juiced
opt: Mesquite or Hickory Liquid Smoke
opt: Salt

  • Move oven rack to about 4-6 inches away from the top broiler.
  • Turn oven's top broiler to 550*.
  • Line baking sheet pan with foil.
  • After you've tossed the veggies, together, with the oil mixture; pour veggies onto lined baking sheet.
  • Place under the broiler and set timer to 5 minutes. Yes, it will smoke!
  • After 5 minutes, pull rack and use tongs to turn over the tomatillos and all of the veggies to cook and char the opposite side.
  • Set timer for 5-7 more minutes. You have control over how much charring you'd like!

While the veggies broil: 

  • Chop the cilantro in halves or thirds to prevent the stems wrapping around the blades of the blender or processor.
  • Zest and juice the limes


When the veggies are ready:

  • Remove from the broiler and let cool for just a couple of minutes.
  • When cool enough to handle, unpeel the foil from the edges of the sheet pan and use to funnel the veggies into your food processor or blender. **If using a blender, be sure to use a towel to hold the lid down. The warm veggies might build steam during the blending and explode the lid! Yes, I have had this happen!
  • Add the cilantro, lime zest and juice to the food processor or blender with the veggies. 
  • Optionally, this is when I add the splash of liquid smoke. I do not add salt until I taste the final product on a salted tortilla chip! Rarely do I ever add salt to salsa because of the salty chips.
  • Pulse the food processor or blender until desired consistency.
  • Enjoy immediately or pour into lidded container to place in fridge!

See?! Wasn't that easy?! You've unhusked the mystery to those cute, little tomatillos and made fresh, whole food for your family to "mmmmm" over! Fresh is best, especially when you control the ingredients! Let me know how your Roasted Salsa Verde turned out!

Tuesday, October 9, 2018

Tuesday Recipe: PUMPKIN SOUP

Every October I do #PunkinChunkin #31DaysOfPumpkin as a fun expo of all things pumpkin and squash and pumpkin spice. I try the newest packaged food, restaurant offerings and other pumpkiny products giving my two-cents-worth of opinion. Going with the creative flow, I try out recipes or generate some of my own concoctions.

Momma wasn't feeling too perky and I was getting pretty hungry, so we needed a quick-fix dinner. Time to either get creatively nutritious or run through the drive-thru for something not good for us. I tend to prepare to the size of the pot and end up with way too much food. So, I chose the smaller pan to limit the recipe and here's what popped out of the pot...

PUMPKIN SOUP

2 cups 100% Pumpkin (not the pie filling)
1 cup Almond Milk (or your choice of "milk")
32 ozs Vegetable Broth (the entire package)
2 Shallots, thinly sliced (or a small mild, sweet onion like Vidalia)
1 tablespoon Olive Oil, your choice
2 tablespoons to 1/4 cup Maple Syrup
1/2 teaspoon Nutmeg
**optional: 1/4 teaspoon Cinnamon
**optional: 1/2 teaspoon Curry Powder
Salt, to taste
**optional: Sriracha Sauce, added to each bowl, to taste

Note:  I did not have a clove of garlic to sauté with the onion, but the veggie broth had enough essence of garlic for this recipe.
  • Sauté thinly sliced shallots (and garlic, if you choose) in just a little Olive Oil until transparent.
  • Add spices to shallots and slowly stir-in "milk" and broth and maple syrup.
  • Spoon-in pumpkin stirring until loosened.
  • Let simmer.
  • Salt, to taste.
  • If you want a velvety bisque, use an immersion blender to zip all ingredients down.
  • If you don't mind the thinly sliced shallots (or onions & garlic), just stir occasionally making sure the soup doesn't scorch on the bottom.
  • Serve with a good bread and perhaps a dollop of sour cream. ENJOY!
Tip: Each person can add the curry or sriracha to their bowl. Add a little at a time and taste.

Go play with your food!

Friday, September 7, 2018

Recipe: Apple Betty Bites

I feel as summer gives way to fall, there is a monthly order to my food. September is for apples and candy corn! It's a natural progression! Next month, I will consume more pumpkin and pumpkin spice than any one human should be allowed.

I know, you're rolling your eyes. But, I bet you have an order for preferred special delights. 

Momma, known as "Granny" to our son, recently moved to Tennessee to share our home, which makes for cooking magic! Yesterday, we celebrated the arrival of autumn in name only, because it's still 93-freaking degrees, and mixed up some snack bites using her favorite apple, the Granny Smith. 

APPLE BETTY BITES
(or Apple Pie Bites or Granny's Granny Smith Bites)

1 1/2 cups Old Fashioned Oats (...not quick-cooking)
3/4 cup Nut Butter (We used creamy peanut butter.)
3/4 to 1 cup Granny Smith Apple, grated
1/2 cup Nuts, finely chopped (We chose walnuts, because the other option was almonds)
1/2 cup Flax Seed (We used the whole seed instead of ground, because ground tends to suck the moisture right of nut butters.)
1/3-ish cup Louisiana Honey (Momma brought some with her.)
2 tablespoons Chia Seeds (...because I love the little "pop" when you bite into them.)
1/2 teaspoon Vanilla Extract (I imagine freshly scraped vanilla seeds would taste amazing!)
1/2 - 3/4-ish teaspoon Cinnamon, to taste

  • Shred or grate the apple using a box grater. One apple didn't warrant me pulling out the food processor. Know what I mean?
  • Using a spatula or a mixer, stir all ingredients together until completely combined.
  • Your choice, cover and chill for, at least, 30 minutes -OR- skip to next step...
  • Using a 1" scoop is much faster and less messy than rolling each 1" ball between your hands. As you scoop, release onto parchment paper lined cookie sheet and transfer to either the fridge or freezer.
  • Once chilled or frozen, store in airtight container, separating each layer of bites with parchment.
  • Yes, parchment paper was invented by God.
  • Great to pop into your mouth when you need a little something or a little energy!

Tips:

  • Use your choice of nut butter, keeping in mind some butters are drier than others requiring more honey.
  • Speaking of honey... to make these little bites plant-based, use Agave! We did not have enough Agave for this recipe; thus, the honey from Louisiana.
  • You could totally dust the top of the bites with cinnamon prior to chilling or freezing!
Go play with your food! Then, let me know how your bites turned out or how you changed up the recipe!
---"Sam"

Monday, October 2, 2017

October Skillet Hash

October Skillet Hash with Fire Roasted Tomatoes
Right up there with Christmas in December is my other favorite, ALL THINGS PUMPKIN in October!

As a foodie, I get pretty excited about ways to enjoy the little plump squash. From sweet to savory to seeds to spice, I think it's tasty, healthy and the color is pretty nice! Today's recipe is a spin on a previous recipe, Veggie Skillet Hash, originally posted in October, 2013.

So, how did I change it up? Three ways: I added diced pumpkin and sweet potatoes in my little cast iron skillet while my hubby's skillet had chicken. The third way is by listening to a reader of my blog (and sister kitchen-ninja) when she suggested I add Fire Roasted Tomatoes for that "extra juiciness." Sorry, it took me so long to get there!

October Skillet Hash

1 large, Onion, diced
1 Red Bell Pepper, diced
3 cloves Garlic, minced
1 tablespoon fresh Rosemary leaves, chopped
1 tablespoon fresh Thyme leaves
1 teaspoon ground Sage
3-4 Red Skin Potatoes (or whatever ya got), diced
1 cup Pumpkin, diced (or substitute butternut squash)
1 small Sweet Potato, peeled & diced
1 (15 oz) can Cannellini or White Navy Beans (whatever ya got), drained & rinsed
1-2 cups Kale, large stems removed & leaves coarse chopped
1-2 cans Fire Roasted Tomatoes
S&P, to taste
Red Pepper Flakes

Olive Oil
(optional: 1-2 chicken breasts, sliced thinly)

...and before Fire Roasted Toms were added.
Because my hubby doesn't care for pumpkin nor sweet potatoes, but wants meat, I divided some of the ingredients between the two cast iron skillets.

  • Sauté onion and red bell pepper over medium heat in olive oil or splash(es) of water until just getting soft.
  • Add garlic, herbs, diced potatoes, pumpkin and rinsed beans. Cook slowly --don't rush-- until taters and pumpkin are fork-tender, approx 20 minutes.
  • Add kale, seasonings and fire roasted tomatoes and continue cooking until kale wilts and skillet is bubbly!

Serve with a good bread or cornbread or crackers, even! Enjoy!

Tip: If you have left-overs, the taters and pumpkin may soak up the "extra juiciness." Re-saucy with a little bit of water or veggie broth.

Go Play with Your Food!

"Sam"

Monday, July 17, 2017

Recipe: Veggie Broth

It's no mystery. I thought it was.

As a young wife and mom... <REPHRASE> As a young cook discovering her creative juices, I would spend money on cans and waxboard containers of chicken stock, beef broth, veggie broth, seafood stock thinking it must be a difficult, all-involving task to create. 

Nope, it's not. 

Applied knowledge is power!

We all know water adds no flavor when cooking and boiling. Grains like rice and quinoa absorb the water yielding very little flavor. Substituting broth in the place of water creates depth or layers of flavors. Suddenly, you're not trying as hard to make the bland potato tasty by adding tons of salt, because it has absorbed the flavorFULL broth!

Summer's fresh vegetable bounty is a perfect time to create a savory broth or stock to freeze until the chilly winds of fall and winter call for steamy soups and hearty stews. Making your own broth is as easy as... 

Oh, wait. The difference between stock and broth?

First, STOCK"Livestock makes Kitchen Stock." Stock is made when the bones (sometimes, with the meat attached) are covered in water and cooked for hours until the flavor and gelatin from inside the bones is rendered. It's just this simple: Chicken Bones = Chicken Stock; Turkey Bones = Turkey Stock; and Beef Bones = Beef Stock. Same for fish. For seafood stock, I have boiled the shells and shrimp heads after peeling raw shrimp to make a broth. Purists may choose to cook the bones without adding herbs and aromatic veggies, such as onions and garlic. <meh>... to each her own. 

Vegetable Stock vs. Vegetable Broth. Keep reading...

Next, BROTH. Broth is the clear-ish liquid after the bones and extra flavor (aromatic veggies and herbs, etc.) have been strained out. Purists will be militant about clarity. If that's you, use cheesecloth to strain the broth. Not being that picky, I opt for a colander with small holes or mesh strainer over an empty container to capture the flavorFULL liquid, which may be slightly cloudy. 

How did I make my latest batch of VEGETABLE BROTH pictured in these photos?

Into a large pot or "stock" pot, I tossed in the following:

Fresh Corn Cobs. There's flavor in the cobs! I cut off the corn to use in recipes.
Root ends and tops of green onions wilting in the fridge. I sautéd the white and light green parts in a different recipe.
Bell Peppers that were soft with some bad spots. I cut out the bad spots, removed the stem, seeds and white membrane leaving the peppers in big chunks.
Large Onion or 2 cut in half with the skin and root bottom. It's all gonna be strained out.
Garlic cloves. Whole or crushed? I don't remember. Maybe, cut and tossed in.
Celery Ribs. Leafy tops and all, cut, and washed, first.
Carrots cut into big chunks.
Rosemary Stems with LeavesIt's my favorite herb.
Whole Peppercorns. I had 'em, so I used 'em.

I added enough water to cover the veggies. TIP: Do not add salt. I placed the lid loosely on pot and walked away. The veggies simmered or lightly boiled for a couple of hours. My house smelled delicious!

I let the stock cool completely, and, then, strained out the veggies. I prefer to freeze my broth in either freezer zip baggies, doubled, or in clean jars. If this is your choice, remember: Do Not Fill to the Rim. The freezing liquid expands with enough power to break a jar...in the freezer...creating a mess and splinters of glass. All your hard work of capturing a flavorFULL broth will have to be trashed. Learn from my mistake.

This cold weather season, when you start thinking soup would be perfect, take the jar(s) or baggie(s) of broth out of the freezer, place on a kitchen towel or in the sink to let thaw. Use the thawed broth  --that broth YOU made with your own two creative hands--  in your favorite recipes for a truly homemade taste! Now, you can add the salt.

FYI: Onion, bell pepper and celery are known as the "holy trinity" in Cajun cooking. GO PLAY WITH YOUR FOOD!

Tuesday, June 27, 2017

Tomato Pie

People accuse me of eating "weird things." Simply not true. 

For the most part, I consume fruits, veggies and grains. Quinoa is a grain similar in preparation to rice or oats. Occasionally, my plant-based protein smoothie will be green from veggie powder or purple from blueberries or brown from cocoa powder. Tofu can be seasoned, baked and added to a dish instead of meat. My homemade hummus is made from chickpeas (a.k.a. garbanzo beans)... as is the store-bought hummus. My favorite cheat food is seafood. I can devour a hefty portion of turkey at Thanksgiving! So how is that "weird?" I thought tomato gravy sounded weird when I was a kid, but it is not!


Although this recipe may sound "weird" to you, it's one of those the old timers would eat because they grew their own food, both plant and animal! Now, it's a little updated from Braum's Fresh Market headquartered in Oklahoma City!

The tip is to find flavor-FULL heirloom tomatoes. Take cash and shop your local Farmer's Market! You'll thank me, later!


Tomato Pie

3-4 large Tomatoes, peeled and sliced
1/4 to 1/2 cup of Fresh Basil leaves, cut into strips
1 Tablespoon of Fresh Oregano, finely chopped
3-4 Green Onions, greens and whites sliced 
1 cup Mozzarella, shredded/grated
1 cup Colby Jack, shredded/grated
1/4 to 1/2 cup Parmesan, shredded/grated (not the powdered pizza stuff)
1 cup Mayonnaise (I used a Vegan mayo infused with truffle oil)
S&P
Bake on a cookie sheet lined
with parchment or a Silpat

Your Choice: 1 pre-baked pie crust shell (9 inch or deep dish) OR a pie crust which has been unrolled, formed into a pie pan, fork-pricked, baked & cooled before assembling the pie. I used a frozen deep dish pie crust which I thawed, pricked the bottom with a fork and baked.

  • If pie crust is not pre-baked, follow instructions on package. Let cool.
  • Preheat oven 350*.
  • Peel tomatoes using the hot simmering water method (scroll to bottom of post) prior to slicing.
  • When toms are cool enough to handle, slice and place in colander in the sink in 1 layer. Sprinkle with salt and allow to drain for 10 minutes.
  • Layer the tomatoes slices in baked pie shell. Sprinkle with fresh herbs and green onions. Season with pepper.
  • In a separate bowl, combine all 3 cheeses with mayonnaise and spread mixture on top of toms to the pie shell.
  • Bake for 30-45 minutes until lightly browned. (Keep a watch on it, because nobody likes burned cheese.)
  • Isn't she pretty!
  • Let set for 10 minutes prior to slicing.

Serve with a side salad of gathered greens or a bean salad.

Note: Made with real cheese, this dish is considered "vegetarian." I'm anxious to try it with Miyoko's Artisan Cultured Vegan Cheese! Yeah, I know... that sounds "weird."

How do ya peel a tomato with boiled water?
Slice an "X" on the bottom side of the tomato skin and lower into a pot of simmering (not boiling) water. Allow to "bathe" for about 30 seconds to 2 minutes depending upon the personality of the tomato! Lift with strainer or slotted spoon and let cool in a bowl or colander in the sink. Then, slip the peel from the meat of the tomato!

GO PLAY WITH YOUR FOOD & LET ME KNOW HOW IT TURNED OUT! 
--"Sam"

Tuesday, May 2, 2017

Israeli Couscous with Roasted Chickpeas & Veggies

I cannot tell a lie. This is not my creation. 

Samantha, a participant in my REFIT with Sam i Am class, blessed me with a free box from HelloFRESH, a weekly home-delivery meal planning company. There are three different plans: Classic, Veggie and Family with each serving 2-4 persons. For us, I found it easier to order the Vegetarian adding meat, at home, to my hubby's portion. Each box arrives with fresh ingredients for 3 different meals and laminated recipe cards! You control the spice and seasonings. I think this would be an excellent idea for vacations where you have access to a kitchen. Simply pack or purchase the basic supplies, like olive oil, butter and your fave kitchen knife. Then, have your HelloFRESH box delivered to your vacation home for the week!

Israeli Couscous with Roasted Chickpeas & Veggies


1 Zucchini
1 cup Heirloom Grape Tomatoes
Olive Oil (or your favorite oil)
Fresh Thyme
2 Green Onions (a.k.a Scallions)
2 Cloves Garlic
The juice of 1 Lemon
1 can Chickpeas (a.k.a. Garbanzo Beans)
1-2 tablespoons Smoked Paprika
2 tablespoons Butter
1 1/2 cups Israeli Couscous
1 1/2 cups Veggie Stock
Feta Cheese Crumbles
Black Pepper

  • Heat oven to 425*.
  • Trim zucchini and cut into 1/2" cubes. Halve tomatoes. Strip thyme leaves from steps. Discard stems. Thinly slice green onions, keeping green portion separate from white portion. Mince garlic. Halve lemon.
  • Toss zucchini cubes, tomato halves and half of the thyme leaves in a drizzle of olive oil. Season with black pepper. Spread on one end of a cookie sheet lined with either parchment paper or a Silpat® (my preference). THEN...
  • Rinse and drain chickpeas in a strainer under running water to remove extra salt and that weird starch-gel. Toss in olive oil and smoked paprika and black pepper. Spread chickpeas on the other end of the lined cookie sheet from the veggies.
  • Roast 425* for 20 minutes, tossing or stirring everything around about halfway through. Chickpeas may pop in the oven, which is natural!
  • While veggies are roasting, prepare Israeli Couscous...
  • Heat butter, minced garlic and scallion whites in a skillet over medium-high heat for about 2-3 minutes, add dry couscous and remaining thyme and black pepper. Cook, tossing or stirring until couscous is lightly toasted about 3-4 minutes. Watch the skillet. The browning butter could burn quickly. Any bits stuck to skillet will be deglazed in the next step.
  • Stir 1 1/2 cups veggie stock into skillet. Bring to boil, lower heat and simmer until couscous is al dente (like pasta) 10-12 minutes.
  • When the veggies are roasted and the couscous is ready, stir together with the juice of 1 lemon and as much feta as you desire. 
  • Serve with feta and green scallions (a.k.a the tops) sprinkled on top.
  • ENJOY! 
TIPS: 
  • You can easily make this dish vegan by omitting the feta cheese and substituting your fave oil or vegan butter in place of the dairy butter.
  • Also, if you or your family are meat eaters, this works well as a side dish to either chicken or fish!

GO PLAY WITH YOUR FOOD... and check out HelloFRESH!

Tuesday, January 31, 2017

Tuesday Recipe: Tater Soup

The weather has been simply bipolar. It was 72 degrees on this last day of January! Didn't it snow just a couple of days ago? Why yes, yes, it did! 

While it was still cold outside, I made a smaller pot of homemade potato soup because it is so easy and quick! And, if you have some potatoes which are starting to soften, you can use them in soup!

So, here's how I cooked up my TATER SOUP... 

Potatoes, cut into large chunks 
Onion, diced
Olive Oil (for sautéing onion)
1 Packet dry Hidden Valley Ranch Dressing Mix
*Sharp Cheddar Cheese, shredded
S&P
(optional: garlic, Italian seasoning blend, pepper flakes, rosemary, etc.)

*Into a hot pot, drizzle 1 Tablespoon of oil -OR- water.
*Dice Onion and sauté in oil (or dry sauté in water) until soft and opaque.
*Wash and cut potatoes into larger chunks of approximate same size to cook at the same time.

Note: I don't peel my potatoes. That's up to you. On-hand I had Yukon Gold Potatoes, which is unusual. Typically, I use Red Skin (a.k.a. New Potatoes). Use whatcha got!

*Add tater chunks to sautéd onions in the pot.
*Add enough water to cover taters by about 1". Boil until fork-tender. (This means when you stick the tines of a fork into a chunk of potato, it slides in with little resistance.)

Note: Evaporation will occur during the 20-ish minutes of boiling. You MAY need to add more water to the pot.

*While taters are boiling, shred your block of cheese ... unless you purchased the bag of it already shredded.
*When taters are fork-tender, get your potato masher or immersible hand blender and smash away to desired consistency. Our family prefers some smaller chunks left instead of a velvety texture.
*When desired consistency is reached, stir in the packet of dry Ranch Dressing Mix and as much cheese as you want! Remember, cheese adds saltiness. If the pot was large, you may want to add a 2nd packet of the dry Ranch Dressing.
*Taste it. Does it need salt & pepper? Does it need more cheese? Does it need spice? Does it need more water?
*Serve it up in a bowl or large mug with extra cheese, a dollop of sour cream or plain Greek yogurt or bacon crumbles and some bread or crackers! ENJOY!

OK! Go Play with Your Food! And, be sure to let me know how YOUR soup turned out and what you did differently!

NOTE: I prepared this soup with the Black Rind Sharp Cheddar purchased at Simonton's Cheese & Gourmet House, a Tennessee company.