Showing posts with label plant-based nutrition. Show all posts

Wednesday, October 20, 2021

Pumpkin Protein Smoothie Bowl

When I discovered the Smoothie Bowl locally at The Juice Bar, it was love at first bite! 

This is the first year for me to create a pumpkin version. It's pumpkiny, bananay and full of whole food goodness -including half an avocado- to satiate my hunger until a late lunch. And, this recipe fits into a Paleo or KETO. If you're strict, leave out the pitted date.

It's good even without my preferred protein enhancements from Ancient Nutrition! But why miss an opportunity to bless your body? 

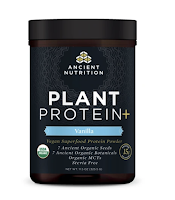
A quick note about my protein choices. The Multi Collagen Protein earns a WOWZERS from me, because it mixes into beverages and recipes without a weird texture or grit. Basically, it dissolves which means it's easily absorbed into your gut to work its magic! Collagen is not vegan. However, I prefer a plant-based protein powder for the taste, which is why I choose Plant Protein+ Vegan Superfood Protein Powder. Try both for yourself. (if the code doesn't pop up, email me for a special code). While other flavors are available, vanilla is my go-to, because I can make it work with all kinds of fruits, coffee, and extracts!

Here it is, my first-ever...

PUMPKIN PROTEIN SMOOTHIE BOWL

Into a food processor or blender...

  • 3/4 to 1 cup Unsweetened "Milk" (your choice, I used almond)
  • 1/2 cup+ 100% Pumpkin Puree' (Libby's will do, not the pumpkin pie mix)
  • 1 small frozen Banana (or half of a large frozen banana)
  • 1/2 large Avocado (or whole small avocado or frozen chunks, healthy fat)
  • 1 pitted Date (added for depth of flavor sweetness)
  • 1 scoop Ancient Nutrition Multi Collagen Protein
  • 1 scoop Ancient Nutrition Plant Protein+ Powder
  • 1 tablespoon Pumpkin Spice (I make my own bc I like extra nutmeg)

Toppings...

You can totally use your own protein powder and your own cooked pumpkin! Now, Go Play with Your Food and let me know how it turned out!

"Sam"

Tuesday, October 9, 2018

Tuesday Recipe: PUMPKIN SOUP

Every October I do #PunkinChunkin #31DaysOfPumpkin as a fun expo of all things pumpkin and squash and pumpkin spice. I try the newest packaged food, restaurant offerings and other pumpkiny products giving my two-cents-worth of opinion. Going with the creative flow, I try out recipes or generate some of my own concoctions.

Momma wasn't feeling too perky and I was getting pretty hungry, so we needed a quick-fix dinner. Time to either get creatively nutritious or run through the drive-thru for something not good for us. I tend to prepare to the size of the pot and end up with way too much food. So, I chose the smaller pan to limit the recipe and here's what popped out of the pot...

PUMPKIN SOUP

2 cups 100% Pumpkin (not the pie filling)
1 cup Almond Milk (or your choice of "milk")
32 ozs Vegetable Broth (the entire package)
2 Shallots, thinly sliced (or a small mild, sweet onion like Vidalia)
1 tablespoon Olive Oil, your choice
2 tablespoons to 1/4 cup Maple Syrup
1/2 teaspoon Nutmeg
**optional: 1/4 teaspoon Cinnamon
**optional: 1/2 teaspoon Curry Powder
Salt, to taste
**optional: Sriracha Sauce, added to each bowl, to taste

Note:  I did not have a clove of garlic to sauté with the onion, but the veggie broth had enough essence of garlic for this recipe.
  • Sauté thinly sliced shallots (and garlic, if you choose) in just a little Olive Oil until transparent.
  • Add spices to shallots and slowly stir-in "milk" and broth and maple syrup.
  • Spoon-in pumpkin stirring until loosened.
  • Let simmer.
  • Salt, to taste.
  • If you want a velvety bisque, use an immersion blender to zip all ingredients down.
  • If you don't mind the thinly sliced shallots (or onions & garlic), just stir occasionally making sure the soup doesn't scorch on the bottom.
  • Serve with a good bread and perhaps a dollop of sour cream. ENJOY!
Tip: Each person can add the curry or sriracha to their bowl. Add a little at a time and taste.

Go play with your food!

Friday, September 7, 2018

Recipe: Apple Betty Bites

I feel as summer gives way to fall, there is a monthly order to my food. September is for apples and candy corn! It's a natural progression! Next month, I will consume more pumpkin and pumpkin spice than any one human should be allowed.

I know, you're rolling your eyes. But, I bet you have an order for preferred special delights. 

Momma, known as "Granny" to our son, recently moved to Tennessee to share our home, which makes for cooking magic! Yesterday, we celebrated the arrival of autumn in name only, because it's still 93-freaking degrees, and mixed up some snack bites using her favorite apple, the Granny Smith. 

APPLE BETTY BITES
(or Apple Pie Bites or Granny's Granny Smith Bites)

1 1/2 cups Old Fashioned Oats (...not quick-cooking)
3/4 cup Nut Butter (We used creamy peanut butter.)
3/4 to 1 cup Granny Smith Apple, grated
1/2 cup Nuts, finely chopped (We chose walnuts, because the other option was almonds)
1/2 cup Flax Seed (We used the whole seed instead of ground, because ground tends to suck the moisture right of nut butters.)
1/3-ish cup Louisiana Honey (Momma brought some with her.)
2 tablespoons Chia Seeds (...because I love the little "pop" when you bite into them.)
1/2 teaspoon Vanilla Extract (I imagine freshly scraped vanilla seeds would taste amazing!)
1/2 - 3/4-ish teaspoon Cinnamon, to taste

  • Shred or grate the apple using a box grater. One apple didn't warrant me pulling out the food processor. Know what I mean?
  • Using a spatula or a mixer, stir all ingredients together until completely combined.
  • Your choice, cover and chill for, at least, 30 minutes -OR- skip to next step...
  • Using a 1" scoop is much faster and less messy than rolling each 1" ball between your hands. As you scoop, release onto parchment paper lined cookie sheet and transfer to either the fridge or freezer.
  • Once chilled or frozen, store in airtight container, separating each layer of bites with parchment.
  • Yes, parchment paper was invented by God.
  • Great to pop into your mouth when you need a little something or a little energy!

Tips:

  • Use your choice of nut butter, keeping in mind some butters are drier than others requiring more honey.
  • Speaking of honey... to make these little bites plant-based, use Agave! We did not have enough Agave for this recipe; thus, the honey from Louisiana.
  • You could totally dust the top of the bites with cinnamon prior to chilling or freezing!
Go play with your food! Then, let me know how your bites turned out or how you changed up the recipe!
---"Sam"

Saturday, October 21, 2017

Broccoli, Pumpkin & Peanut Stir-fry

During autumn, local Farmer's Markets will have pumpkins of all shapes, colors and uses. Be sure to ask him or her for the most flavorFULL for your recipes and which is best for carving the jack-o-lantern for decorating your porch!

Lenise, my friend from church, gifted me with Basmati Rice from India! I couldn't wait to stay home long enough to get creative in the kitchen using the fragrant rice. A rice cooker is my preference while cooking the veggies, because it will automatically cut-off and I don't have to babysit a pot of rice. WINNING!

For this stir-fry recipe, I diced a little more than 1 cup of the cute little Sugar Pie Pumpkin and roasted the rest to be used, later, for other recipes. Stir-fry is a quick cooking dish perfect for after work. Taking only a few minutes, the veggies cook until slightly softened. If including meat or tofu with this dish, prepare and cook before the veggies.

Broccoli and Pumpkin Stir-fry

1 Onion, diced
1 cup Pumpkin, peeled & diced
2-3 cloves Garlic, minced
1-3 large Carrots, peeled & cut
1-2 large Broccoli heads/bunches, cut into florets a.k.a. "little trees"
8 oz sliced, fresh Mushrooms
1-2 tablespoons Oil (coconut or olive)
For "heat" - Red Pepper Flakes  -OR-  Sriracha
Creamy Peanut Butter & Low Sodium Soy Sauce  -OR-  Chinese Brown Sauce (scroll toward bottom of this post)
Basmati Rice
(optional: Extra Firm Tofu drained and large diced, Chicken or other meat thinly sliced)
  • Heat oil in large skillet to medium high.
  • Sauté onion, pumpkin and carrots until slightly softened. Keep stirring to prevent scorching.
  • Add garlic, broccoli and mushrooms. Keep stirring to prevent scorching.
  • Here's when you add your choice of sauce. Turn down the heat. Pour in enough soy sauce to cover the bottom of the skillet and stir in a big glob of creamy peanut butter  --OR-- use Chinese Brown Sauce in the place of soy sauce. Because veggies are different sizes, just play around with measurements until your veggies are coated and the consistency is where you like it!
  • Add heat...if you're not a wuss!
  • Serve over cooked Basmati Rice and garnish with chopped peanuts.
  • Enjoy!
NOTE: If using meat, cook in heated skillet, then set aside and add before serving


Chinese Brown Sauce
(Forks Over Knives... I've subbed in Molasses & Corn starch)

1/3 cup Low-sodium Soy Sauce
1/3 cup Vegetable Stock
1/4 cup Molasses
1 tablespoon Grated Ginger or Ginger Paste
2 cloves Garlic, peeled & minced
1-2 teaspoons (or more) Corn Starch, dissolved in cold orange juice (water or pineapple juice would work, too)

Combine all ingredients in a medium saucepan and cook over medium heat until thickened. If there are any left-overs, serve with meal or store refrigerated in airtight container.

OK! Go Play with Your Food!

Monday, October 2, 2017

October Skillet Hash

October Skillet Hash with Fire Roasted Tomatoes
Right up there with Christmas in December is my other favorite, ALL THINGS PUMPKIN in October!

As a foodie, I get pretty excited about ways to enjoy the little plump squash. From sweet to savory to seeds to spice, I think it's tasty, healthy and the color is pretty nice! Today's recipe is a spin on a previous recipe, Veggie Skillet Hash, originally posted in October, 2013.

So, how did I change it up? Three ways: I added diced pumpkin and sweet potatoes in my little cast iron skillet while my hubby's skillet had chicken. The third way is by listening to a reader of my blog (and sister kitchen-ninja) when she suggested I add Fire Roasted Tomatoes for that "extra juiciness." Sorry, it took me so long to get there!

October Skillet Hash

1 large, Onion, diced
1 Red Bell Pepper, diced
3 cloves Garlic, minced
1 tablespoon fresh Rosemary leaves, chopped
1 tablespoon fresh Thyme leaves
1 teaspoon ground Sage
3-4 Red Skin Potatoes (or whatever ya got), diced
1 cup Pumpkin, diced (or substitute butternut squash)
1 small Sweet Potato, peeled & diced
1 (15 oz) can Cannellini or White Navy Beans (whatever ya got), drained & rinsed
1-2 cups Kale, large stems removed & leaves coarse chopped
1-2 cans Fire Roasted Tomatoes
S&P, to taste
Red Pepper Flakes

Olive Oil
(optional: 1-2 chicken breasts, sliced thinly)

...and before Fire Roasted Toms were added.
Because my hubby doesn't care for pumpkin nor sweet potatoes, but wants meat, I divided some of the ingredients between the two cast iron skillets.

  • Sauté onion and red bell pepper over medium heat in olive oil or splash(es) of water until just getting soft.
  • Add garlic, herbs, diced potatoes, pumpkin and rinsed beans. Cook slowly --don't rush-- until taters and pumpkin are fork-tender, approx 20 minutes.
  • Add kale, seasonings and fire roasted tomatoes and continue cooking until kale wilts and skillet is bubbly!

Serve with a good bread or cornbread or crackers, even! Enjoy!

Tip: If you have left-overs, the taters and pumpkin may soak up the "extra juiciness." Re-saucy with a little bit of water or veggie broth.

Go Play with Your Food!

"Sam"

Tuesday, May 2, 2017

Israeli Couscous with Roasted Chickpeas & Veggies

I cannot tell a lie. This is not my creation. 

Samantha, a participant in my REFIT with Sam i Am class, blessed me with a free box from HelloFRESH, a weekly home-delivery meal planning company. There are three different plans: Classic, Veggie and Family with each serving 2-4 persons. For us, I found it easier to order the Vegetarian adding meat, at home, to my hubby's portion. Each box arrives with fresh ingredients for 3 different meals and laminated recipe cards! You control the spice and seasonings. I think this would be an excellent idea for vacations where you have access to a kitchen. Simply pack or purchase the basic supplies, like olive oil, butter and your fave kitchen knife. Then, have your HelloFRESH box delivered to your vacation home for the week!

Israeli Couscous with Roasted Chickpeas & Veggies


1 Zucchini
1 cup Heirloom Grape Tomatoes
Olive Oil (or your favorite oil)
Fresh Thyme
2 Green Onions (a.k.a Scallions)
2 Cloves Garlic
The juice of 1 Lemon
1 can Chickpeas (a.k.a. Garbanzo Beans)
1-2 tablespoons Smoked Paprika
2 tablespoons Butter
1 1/2 cups Israeli Couscous
1 1/2 cups Veggie Stock
Feta Cheese Crumbles
Black Pepper

  • Heat oven to 425*.
  • Trim zucchini and cut into 1/2" cubes. Halve tomatoes. Strip thyme leaves from steps. Discard stems. Thinly slice green onions, keeping green portion separate from white portion. Mince garlic. Halve lemon.
  • Toss zucchini cubes, tomato halves and half of the thyme leaves in a drizzle of olive oil. Season with black pepper. Spread on one end of a cookie sheet lined with either parchment paper or a Silpat® (my preference). THEN...
  • Rinse and drain chickpeas in a strainer under running water to remove extra salt and that weird starch-gel. Toss in olive oil and smoked paprika and black pepper. Spread chickpeas on the other end of the lined cookie sheet from the veggies.
  • Roast 425* for 20 minutes, tossing or stirring everything around about halfway through. Chickpeas may pop in the oven, which is natural!
  • While veggies are roasting, prepare Israeli Couscous...
  • Heat butter, minced garlic and scallion whites in a skillet over medium-high heat for about 2-3 minutes, add dry couscous and remaining thyme and black pepper. Cook, tossing or stirring until couscous is lightly toasted about 3-4 minutes. Watch the skillet. The browning butter could burn quickly. Any bits stuck to skillet will be deglazed in the next step.
  • Stir 1 1/2 cups veggie stock into skillet. Bring to boil, lower heat and simmer until couscous is al dente (like pasta) 10-12 minutes.
  • When the veggies are roasted and the couscous is ready, stir together with the juice of 1 lemon and as much feta as you desire. 
  • Serve with feta and green scallions (a.k.a the tops) sprinkled on top.
  • ENJOY! 
TIPS: 
  • You can easily make this dish vegan by omitting the feta cheese and substituting your fave oil or vegan butter in place of the dairy butter.
  • Also, if you or your family are meat eaters, this works well as a side dish to either chicken or fish!

GO PLAY WITH YOUR FOOD... and check out HelloFRESH!

Tuesday, June 14, 2016

Don't Throw it Out

Let's say you're about to leave town.
You're about to leave town knowing there is food in your fridge and pantry that will go bad while you're away.
You feel guilty each time food must be thrown away.
Trashing food is like trashing money.

Let's consider this a twist on the very savvy meal prepping of this generation. I am a traveller by virtue of career and for the love of it. Also, I am a foodie. When a foodie is home for just a few days at a time, a foodie wants to cook! Foodies love to cook with fresh ingredients. Then, said foodie, hits the road, again. Consequently, unused fresh veggies, herbs and fruit may get left behind only to be tossed, later. Waste!

Take for example, this morning. The thought of another beautiful, not to mention pricey, bell pepper shriveling to a mushy, moldy mess in the drawer of the fridge got the better of me. Time to take action and, today, I had time...and 3 bells in the early stages of shrivel. Sautéd bell peppers in a little olive oil are easy! Let cool. Pack into a freezer baggie to use in future recipes!


Let's love that lonely lemon by saving the zest in a snack baggie in the freezer for a lemon cake or salad, later. 


Then, juice that baby into water to keep diced apples from turning brown until the decision is made to cook a couple down into apple butter for cornbread, tonight! 


A few of the extra pieces of apple can join a few less-than-fresh strawberries with a handful of trimmed kale held perfectly frozen until a green smoothie needs that packet of goodness!


Those store-bought herbs costing way too much money to go fuzzy can be stored in the freezer until their fragrance brings life to a pan of aging carrots. 


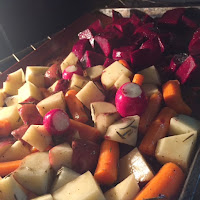
Soft potatoes, limp carrots, lack luster beets and even rascally radishes are perfect for roasting with a toss of olive oil and rosemary, which has been held in a cryo state!

AND, if there are leftovers from dinner, the veggies can be saved in a container in the freezer until a stew needs extra love added!

No waste!

Go play with your food ...and save it until you can get back to it!


Tuesday, June 7, 2016

Tuesday Recipe: Orzo & Roasted Veggie Bake

(served in my grandma's china)
My momma does not claim to be a "good cook." Where she gets this, I'll never know because she learned from her mother who was a wonderful Southern cook. Perhaps, it's that perceived mystery where everything Mom makes tastes so much better, including PB&J. 

Somewhere amid her cookbooks and notebooks and recipe box with cards dating back to before I was born, Mom found this. The flavors just work and, because we are a Lou'siana family, we add fresh Gulf Shrimp! No leftovers, guaranteed.

Orzo & Roasted Veggie Bake

1 lb/bunch Asparagus, trimmed to 1" pieces (do not use the fibrous, woody cut-end)
3 Bell Peppers, diced - red, green and orange makes a dish tasty to the eyes
6 Green Onions OR 1 Vidalia Onion, diced
1 medium Zucchini, round-sliced
1 cup Grape Tomatoes, whole, OR Cherry Toms, halved
4 T Olive Oil, divided
1-2 cloves of Garlic, crushed or minced
1 tablespoon Greek or Italian Seasoning
S&P, to taste
1 cup dry Orzo (I found whole wheat, but have used the other, too)
2 cups Vegetable Broth
3/4 cup Feta Cheese, crumbled
*optional: shrimp

  • Preheat oven to 350 degrees.
  • Prep veggies. Toss well with 2 T of Olive Oil, garlic, seasoning, S&P.
  • Roast seasoned veggies on parchment or Silpat (easy cleaning) for 30 minutes or until tender.
  • While veggies roast, sauté dry orzo in remaining olive oil in a large sauté pan or skillet until brown. This gives the orzo a nutty, earthy flavor. The process reminded me of the old Rice-a-Roni!
  • Add broth, bring to boil, reduce heat to low, cover with lid cooking until liquid is absorbed.
  • Add cooked orzo to roasted veggies (and shrimp, if
    using). Gently mix well.
  • Pour into a large casserole dish.
  • Sprinkle Feta cheese over top. Cover with foil. 
  • Bake 30-ish minutes, making sure shrimp is cooked.
  • Serve hot with an extra sprinkling of Feta + a good Olive Bread and seasoned olive oil for dipping!


Notes:
**Swap in any veggies you prefer: Diced Butternut squash, Brussel Sprouts, Parsnips or Carrots!
**Omitting the shrimp and Feta makes this vegan or Plant-based.
**Let your taste create a new dish with the meat of your choice, but you'll need to know when to add the meat.
**Our side was Graber Olives from California. I found them, again, in Tennessee at The Fresh Martket!


Play with your food!

What's your take on this recipe? 
Have you ever served dipping olive oil?

Tuesday, March 15, 2016

Budino

Don't think healthy = Dessert? Think, again!

This is a BUDINO (boo-deen-oh). --->

It's like a weird looking pudding. But, looks can be deceiving. This budino is sweet and loaded with powerful chia seeds and protein! I had my first budino at LYFE Kitchen in Memphis, Tennessee. The flavor and texture were delightfully unique and vegan, so I decided to make it at home! 


Pictured are two different budinos in process: Banana Coconut Budino made with lite coconut milk and my spin on the recipe using the new offering from Naked® Nutmilk, which comes in Peachy Almond and Berry Almond, both of which are Non-GMO verified and responsibly harvested and packaged!


Budino

1 can of Coconut Milk -OR- 1 container of Naked® Nutmilk
1/3 cup of Chia Seeds (add more or less to suit your desired texture, next time)
2 Tablespoons Agave or Honey (my opinion is Naked® doesn't need it)
optional: 1-2 Tablespoons Unsweetened Coconut flakes

  • Mix the above ingredients
  • Place in airtight (lidded) container in fridge overnight. The next day, the chia should have gelled the mixture into the pudding or budino! 
  • Garnish with complimentary fruit and nuts and spices!
Let your creative juices flow with taste combos! Let me know how your budino turned out!

Go #playwithyourfood!

Tuesday, July 28, 2015

Tuesday Recipe: Tangerines with Lime Essence

Summer are here! Grilling and backyard parties are on! You need a quick, nutritious dessert that doesn't leave you feeling heavy. Sunday's newspaper probably has a coupon for Cuties or Halo Oranges. Or is it Tangerines? Or is it Clementines? Or is it Mandarines?

There really is a difference. Basically, it comes right down to the harvest season, being seedless and easy-to-peel for young eaters. These little sweeties ward off the munchies and are a source of fiber and vitamin C.


Tangerines with Lime Essence
(adopted from eMeals)

1 Tangerine per person (peeled and sectioned)
2-3 large Limes (grate and reserve rind before juicing)

1-3 tablespoonsHoney
optional: Cilantro, coarse chopped

  • Place orange sections in a serving bowl.
  • Whisk together: lime juice, honey and lime rind.
  • Pour lime mixture over orange sections and toss to coat.
  • Taste. Adjust the lime mixture for a sweeter or more tart flavor.
  • Serve cold!
#goplaywithyourfood

Tuesday, July 21, 2015

Tuesday Recipe: Aloo Gobi

Aloo (Potato) Gobi (Cauliflower) is an 
inexpensive "dry" curry for anyone who would like to change up their typical midweek menu! The list of ingredients may seem long, but it's just a simple teaspoon, here and there, to taste.

My husband loved how the house smelled and decided he wanted the curry over rice as opposed to quinoa, which was my choice. I happened to have Saffron Jasmine Rice! Also, after stirring the curry, he mentioned more sauce would be more to his liking. No problem! I added 1 small can of tomato paste and thinned down with vegetable broth and additional Indian spices! Mmmmm!

Aloo Gobi Curry
(adapted from Forks Over Knives, pg 179)

1 medium Yellow Onion, peeled & diced
Ginger (1 T of fresh grated or 1/2 t ground)
2 cloves Garlic, peeled & minced
Small Jalapeño, seeded & minced
Thanks to friends for the garden tomatoes!
2 medium Tomatoes, diced (I used a can of diced toms + fresh garden toms)
1 medium head Cauliflower, cut/plucked into florets
1 lb Potatoes, 1/2" dice or coarse chunks
1 teaspoon ground Cumin
1 teaspoon ground Coriander
1 teaspoon Red Pepper Flakes
1/2 teaspoon Turmeric (which gives the curry it's beautiful color)
1/8-1/4 teaspoon ground Cloves (Don't skip this ingredient - It's the deal maker!)
2 Bay Leaves
Salt, to taste
optional:  1 small can Tomato Paste
optional: Vegetable Broth
optional: Cilantro, coarse chopped
  • Sauté onion over medium heat; 7-10 mins
  • Add ginger, garlic and jalapeño; 3-5 mins
  • Add tomato, cauliflower, potatoes, cumin, coriander, red pepper flakes, turmer, cloves and bay leaves. Cook, covered for 10 mins, until veggies are tender.
  • **IF you choose a wet curry, add the tomato paste and thin with vegetable broth. Simmer for 3-5 mins.
  • Remove the bay leaves. Serve over rice or fave grain.
Remember, cooking is a subjective taste with an objective of enjoying your meal. You know your taste and the preferences of your family... Go play with your food!

Tuesday, May 26, 2015

Tuesday Recipe: Cabbage Salsa

Whether or not "salsa" is the correct word is purely subjective. It tastes good on a tortilla, a tortilla chip and will top tonight's grilled shrimp taco. See? Salsa.

Actually, the basic recipe came from a healthy food blogger, Lindsay, over at Pinch of Yum where she created a "slaw." Of course, she realizes people like herself tend to adapt recipes to their specific taste. And, of course, I just gotta go play with my food to change it up ever so slightly.

A food processor is not required, but greatly cuts down the preppin' time and gets ya to the eatin' time! So fresh!

Cabbage Salsa

1/2 cup Olive Oil
2 tablespoons to 1/4 cup Water
Lime Zest & Juice (How big are your limes?)
Green Onions
Garlic
Jalapeño (How hot do ya like it?)
Cilantro
Green Cabbage, shredded or finely sliced
Salt, to taste

  • Toss all ingredients, with the exception of the cabbage, into the food processor and zip it down! I zipped the cabbage down, earlier.
  • Taste. Does it need more of your fave flavor? Get it to tasting like you like it. Then...
  • Pour over 2+ cups of shredded or finely sliced cabbage and toss it around to coat the cabbage.
  • Um...no more steps. Go eat it and...
Play with Your Food!


Friday, July 18, 2014

Zucchini Bisque

My neighbors and friends passed along veggies from their gardens. With a good supply of bountiful zucchinis and needing inspiration, I turned to my equally bountiful supply of cookbooks. I'm still working my way through Forks Over Knives and discovered Zucchini Bisque. I have plenty of zucs in case this doesn't go so well.

But, it did go well! I really thought the bisque was good. My hubby was not as thrilled. It's not everyday people crave the zuc as soup. I'm a little joyous about the nutmeg coming through. And, the lemon zest adds the sunshine. I froze the rest for this winter when I'm longing for the fresh taste of summer.

For this recipe you will need either an immersion blender or a regular blender to zip down the cooked veggies into a pureé. If using the countertop blender, be sure to hold the lid in place with a towel.

Zucchini Bisque
(page 89, Forks Over Knives)

1 medium Yellow Onion, peeled and finely chopped
4 medium Zucchini, finely chopped (I removed the seeds. They're no fun to eat.)
2 cups Vegetable Stock/Broth
1/2 teaspoon Thyme (I used what I had on-hand, dried.)
1/4 Nutmeg
Zest from one Lemon
1 cup Unsweetened Plain Almond Milk (Or any milk or cream.)
S&P, to taste
**optional: olive oil
  • Sauté onion in a large saucepan over medium heat 7-8 minutes or until onions are tender. Use either the dry sauté method with 1-2 tablespoons of water, at a time to keep onions from sticking to the pan OR use the same amount of olive oil.
  • Add zucs, veggie stock, thyme, nutmeg and lemon zest and cook until zucs are tender.
  • Pureé soup using the immersion blender or in smaller batches in the countertop blender.
  • Return pureé to pot, add milk and salt and pepper. 
  • Cook until heated through.

Serve hot with croutons or a crusty bread!

Tuesday, May 13, 2014

2-on-Tuesday: Lime and Cilantro Cauliflower

On #MeatlessMonday, Olena at ifoodreal.com had me at "lime and cilantro." 

Whether as a side or a vegetarian entree, this is a low calorie, high flavor dish and pairs well with homemade salsa and oven-baked tortilla chips!

Ditch the cheese and you've got a totally plant-based, vegan meal!


Lime & Cilantro Cauliflower

1 large cauliflower head, chopped into bite size pieces
2-3 Limes, zest & juice
4 (or more!) Garlic Cloves, crushed or coarse chopped
1/2 to 1 cup Cilantro, rough chopped or snipped with kitchen shears (save some for the garnish)
1 teaspoon Ground Cumin
1/4 teaspoon Salt
1/2 teaspoon freshly ground Black Pepper
1+ cup Colby Jack or Fiesta Blend Cheese, shredded
**optional: 1/2 to whole Avocado, diced
**optional: drizzle of olive oil

  • Preheat oven to 425 degrees. In large bowl, toss cauliflower with lime zest and juice, garlic, cilantro, cumin, salt, pepper and olive oil, if using. 
  • Let sit to marinate from 10 minutes to overnight.
  • Transfer cauliflower into baking dish (no need to oil). I used a small casserole, 8x11, but a 9x11 would work just fine.
  • The bits of marinate clinging to the bowl will be used, as additional fresh garnish.
  • Bake 15 minutes. Remove from oven and top with the clingy bits of marinate and cheese.
  • As cheese melts, top with additional cilantro ...and avocado.
  • Serve immediately!
Mmmm! Go #playwithyourfood!

How to Peel Garlic!


Found a cool trick for peeling many cloves of garlic, at once! 

I was making salsa and another recipe which required, I'm happy to say, much fresh garlic, when I came across one of those short how-to videos by a chef. FUN & NOISY & totally practical! You'll be impressed with yourself!


Bust open the whole clove by using the heel of your hand.


Place individual garlic cloves into a stainless steel bowl. 
(I'm not sure if glass, plastic or ceramic bowls 
would work, but go ahead and give it a try!)


Invert and cover with another stainless steel bowl.


While holding both bowls together, shake vigorously! 
(It's quite noisy!)


Voila! Your individual garlic cloves should be naked!


Nothing's a good as fresh! Go ahead... #playwithyourfood!


Do you have a cool kitchen tip you wanna share below?